DIY easy Holiday gifts for teachers

This year I planned to make my son’s preschool teachers homemade mason jar holiday gifts. Christmas is everyone’s favorite time of the year and it makes it even better by making your own creative and personalized gifts. This fun and easy idea takes hardly any time to create.

20141218_212518

You will need:

  • Mason jars (available at Dollar Tree)
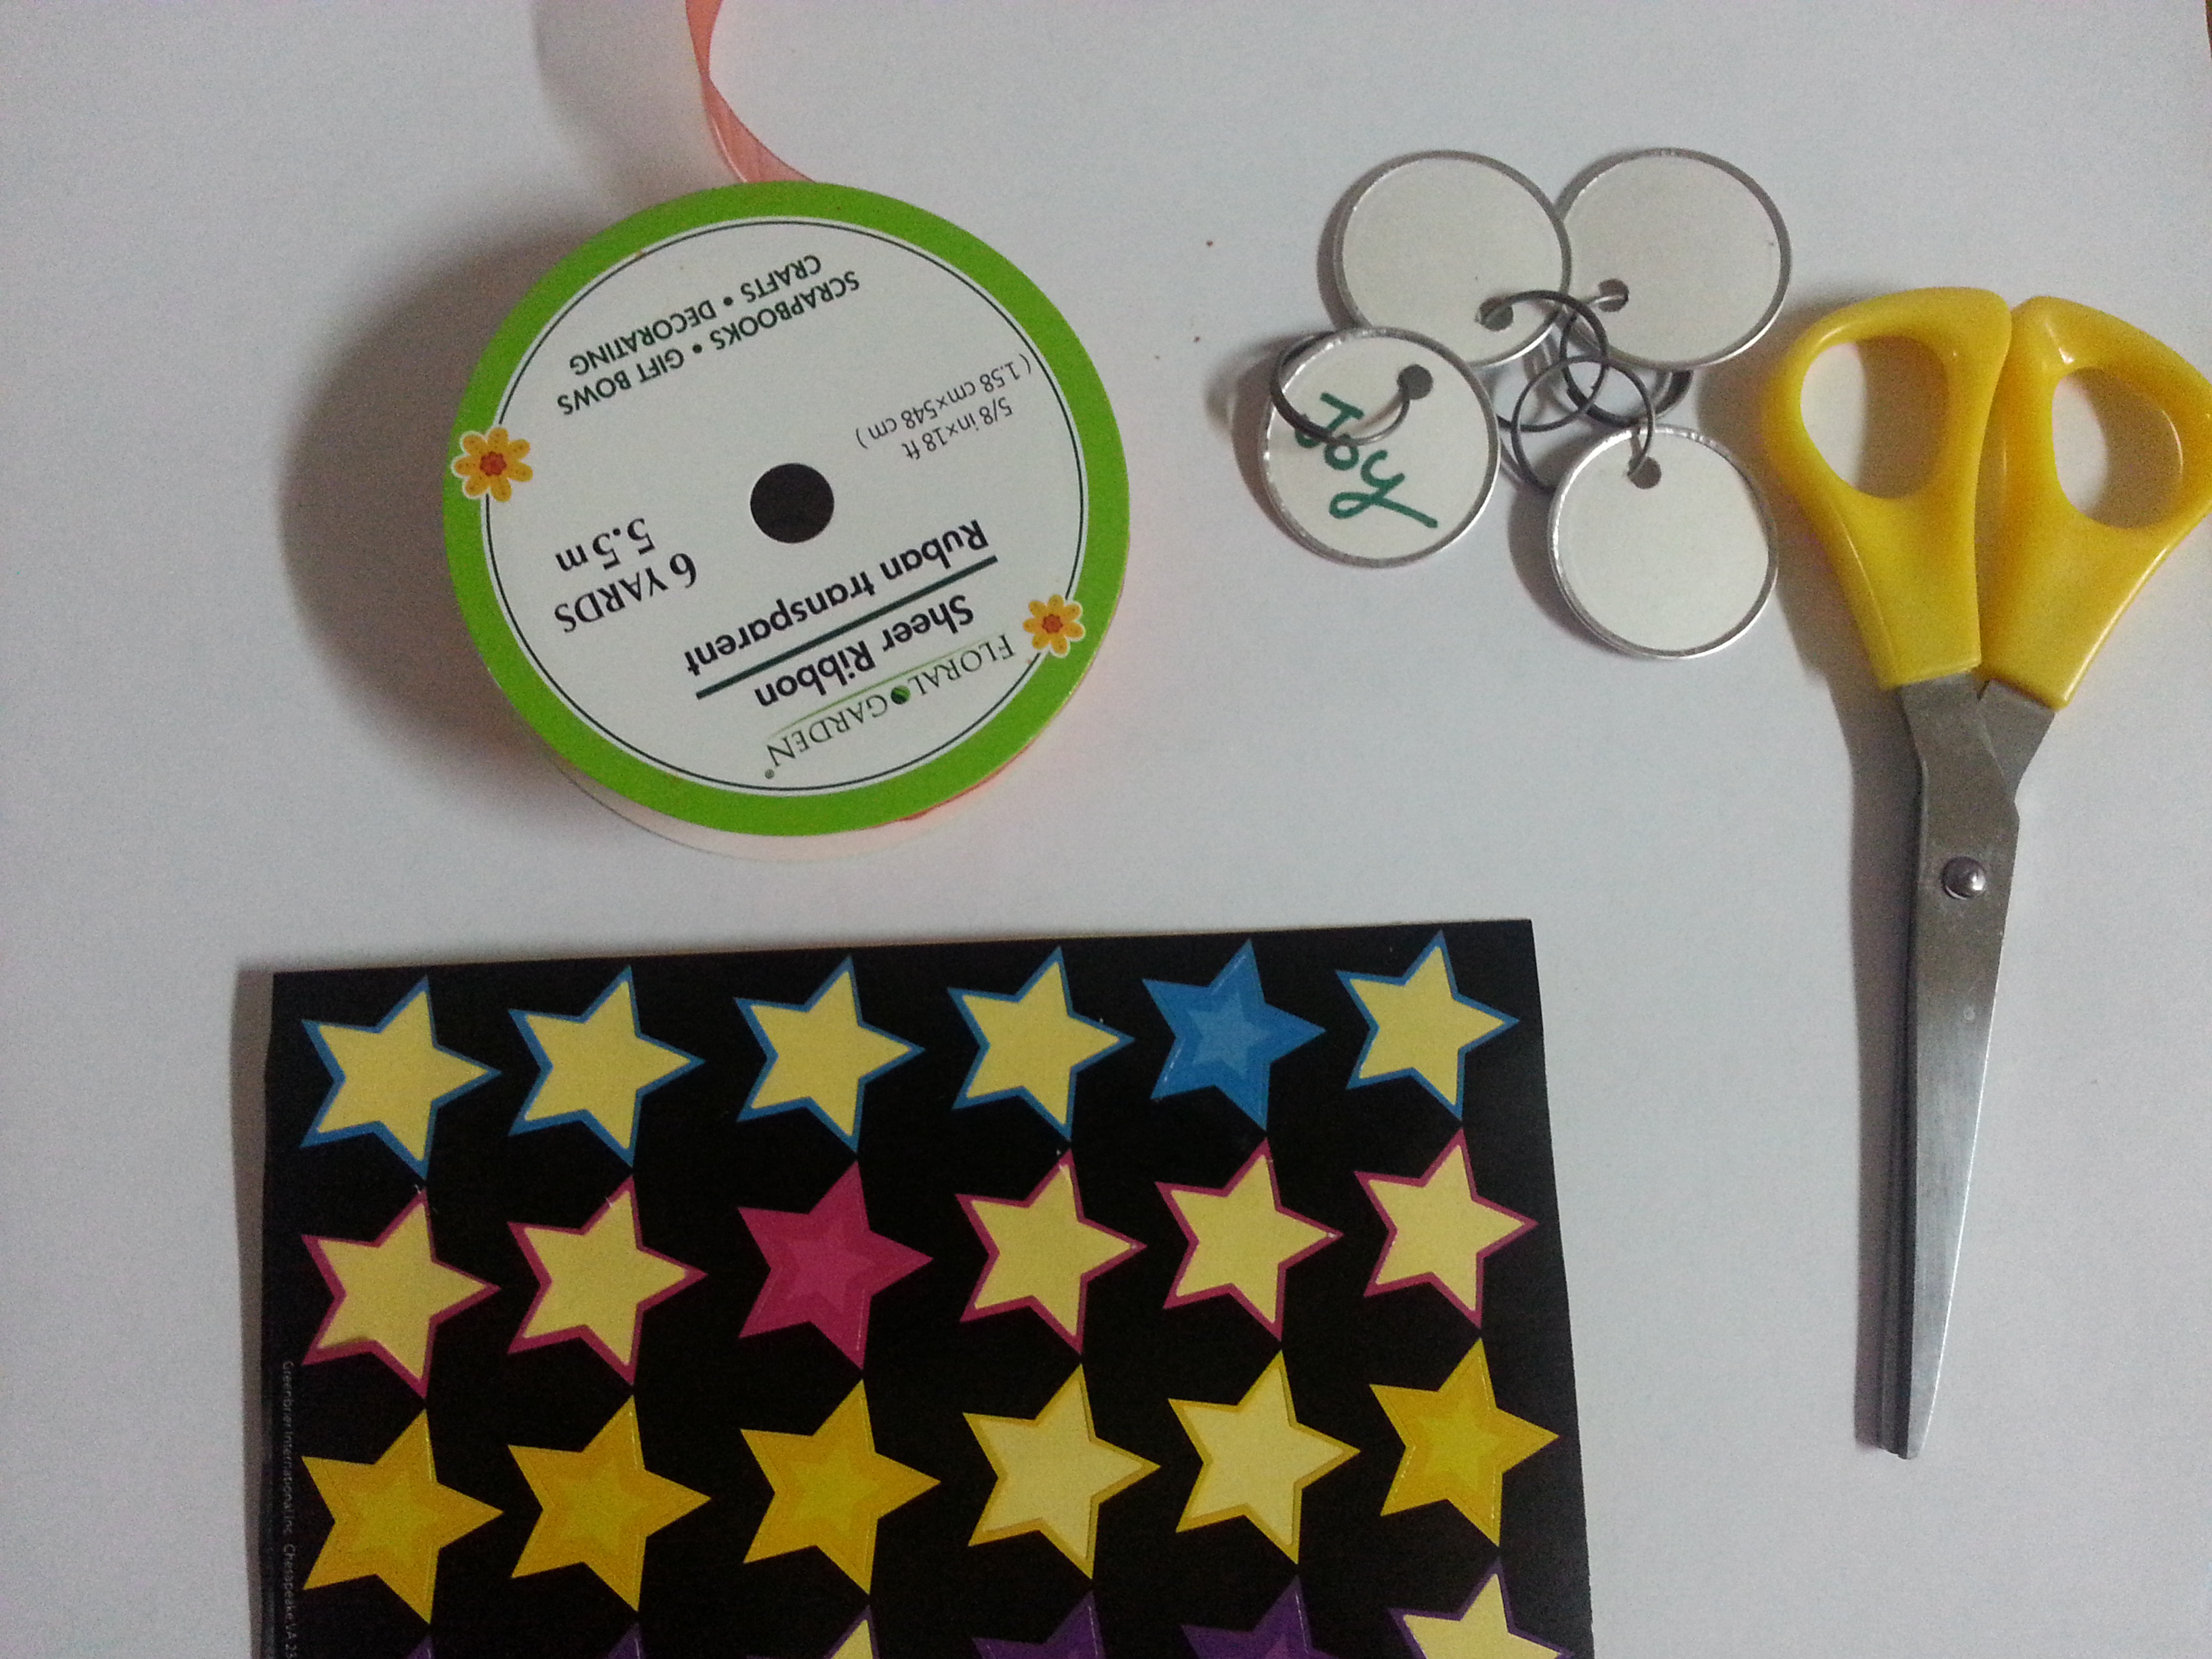
  • Ribbon
  • Scrapbook paper
  • Scissors
  • Key tags
  • Colorful stickers
  • contents – hot drink mixes, marshmallows,  candy canes ( the contents can be anything of your choice)

20141218_205228

20141218_205509

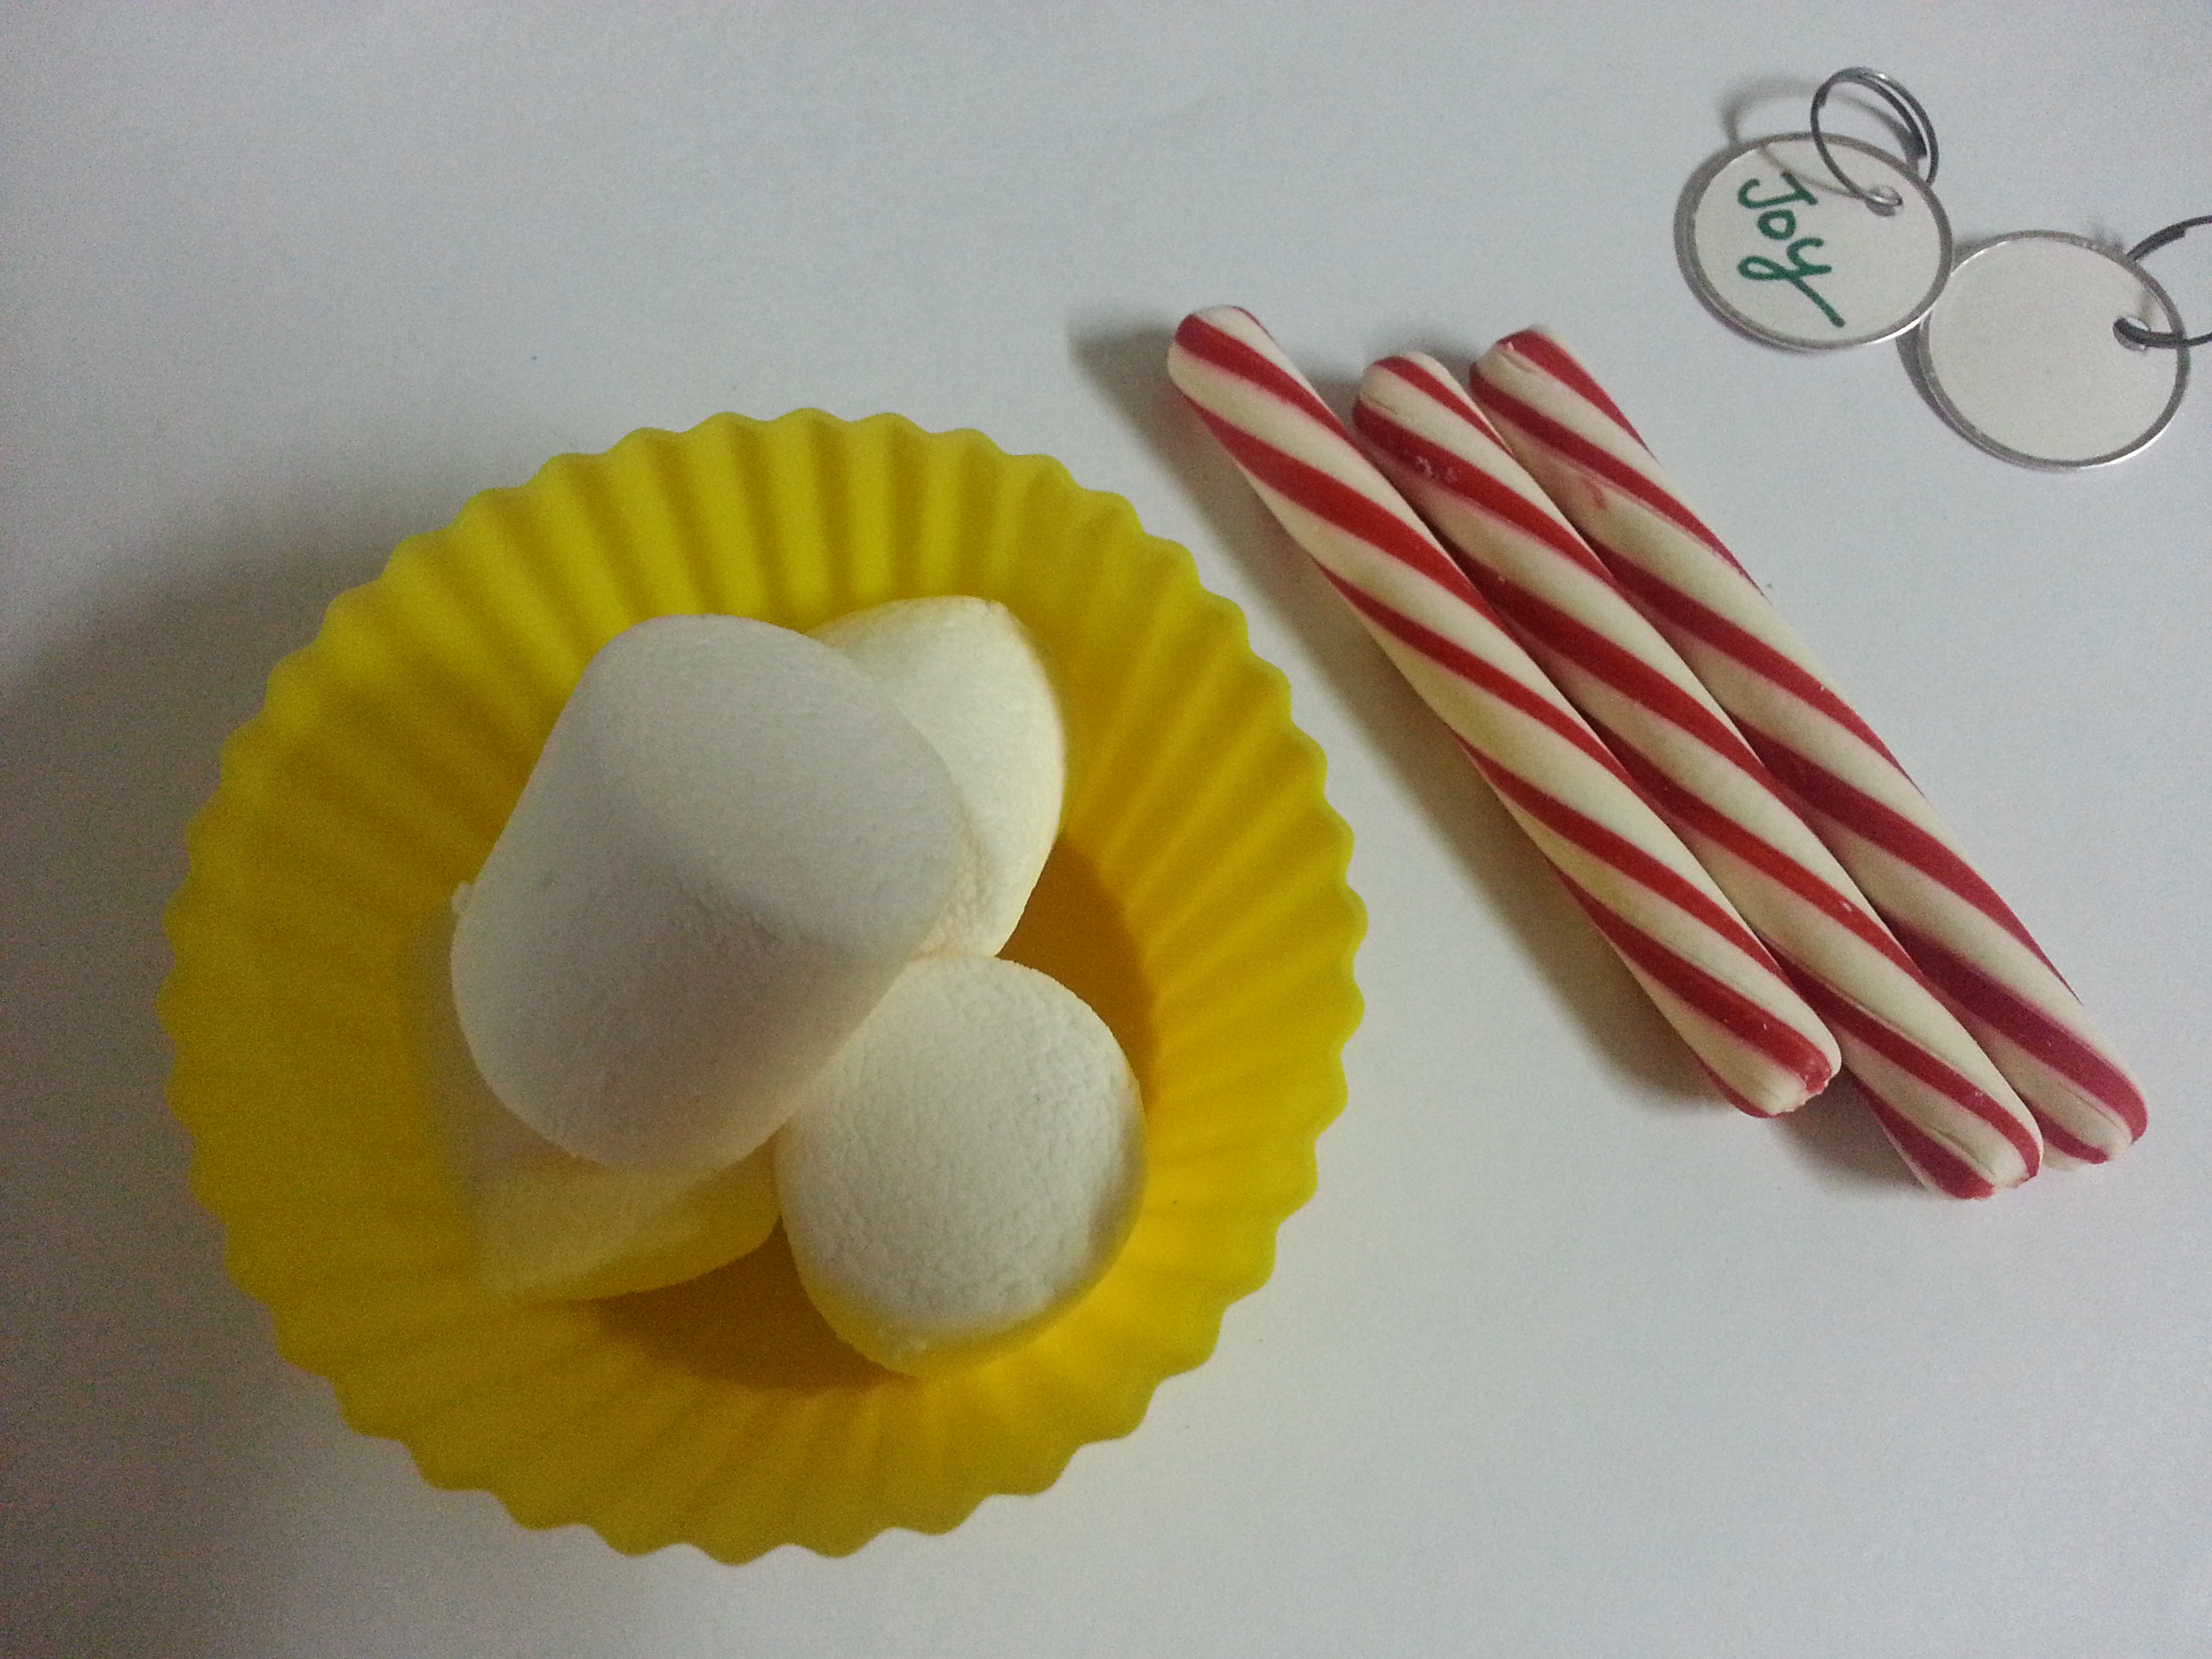
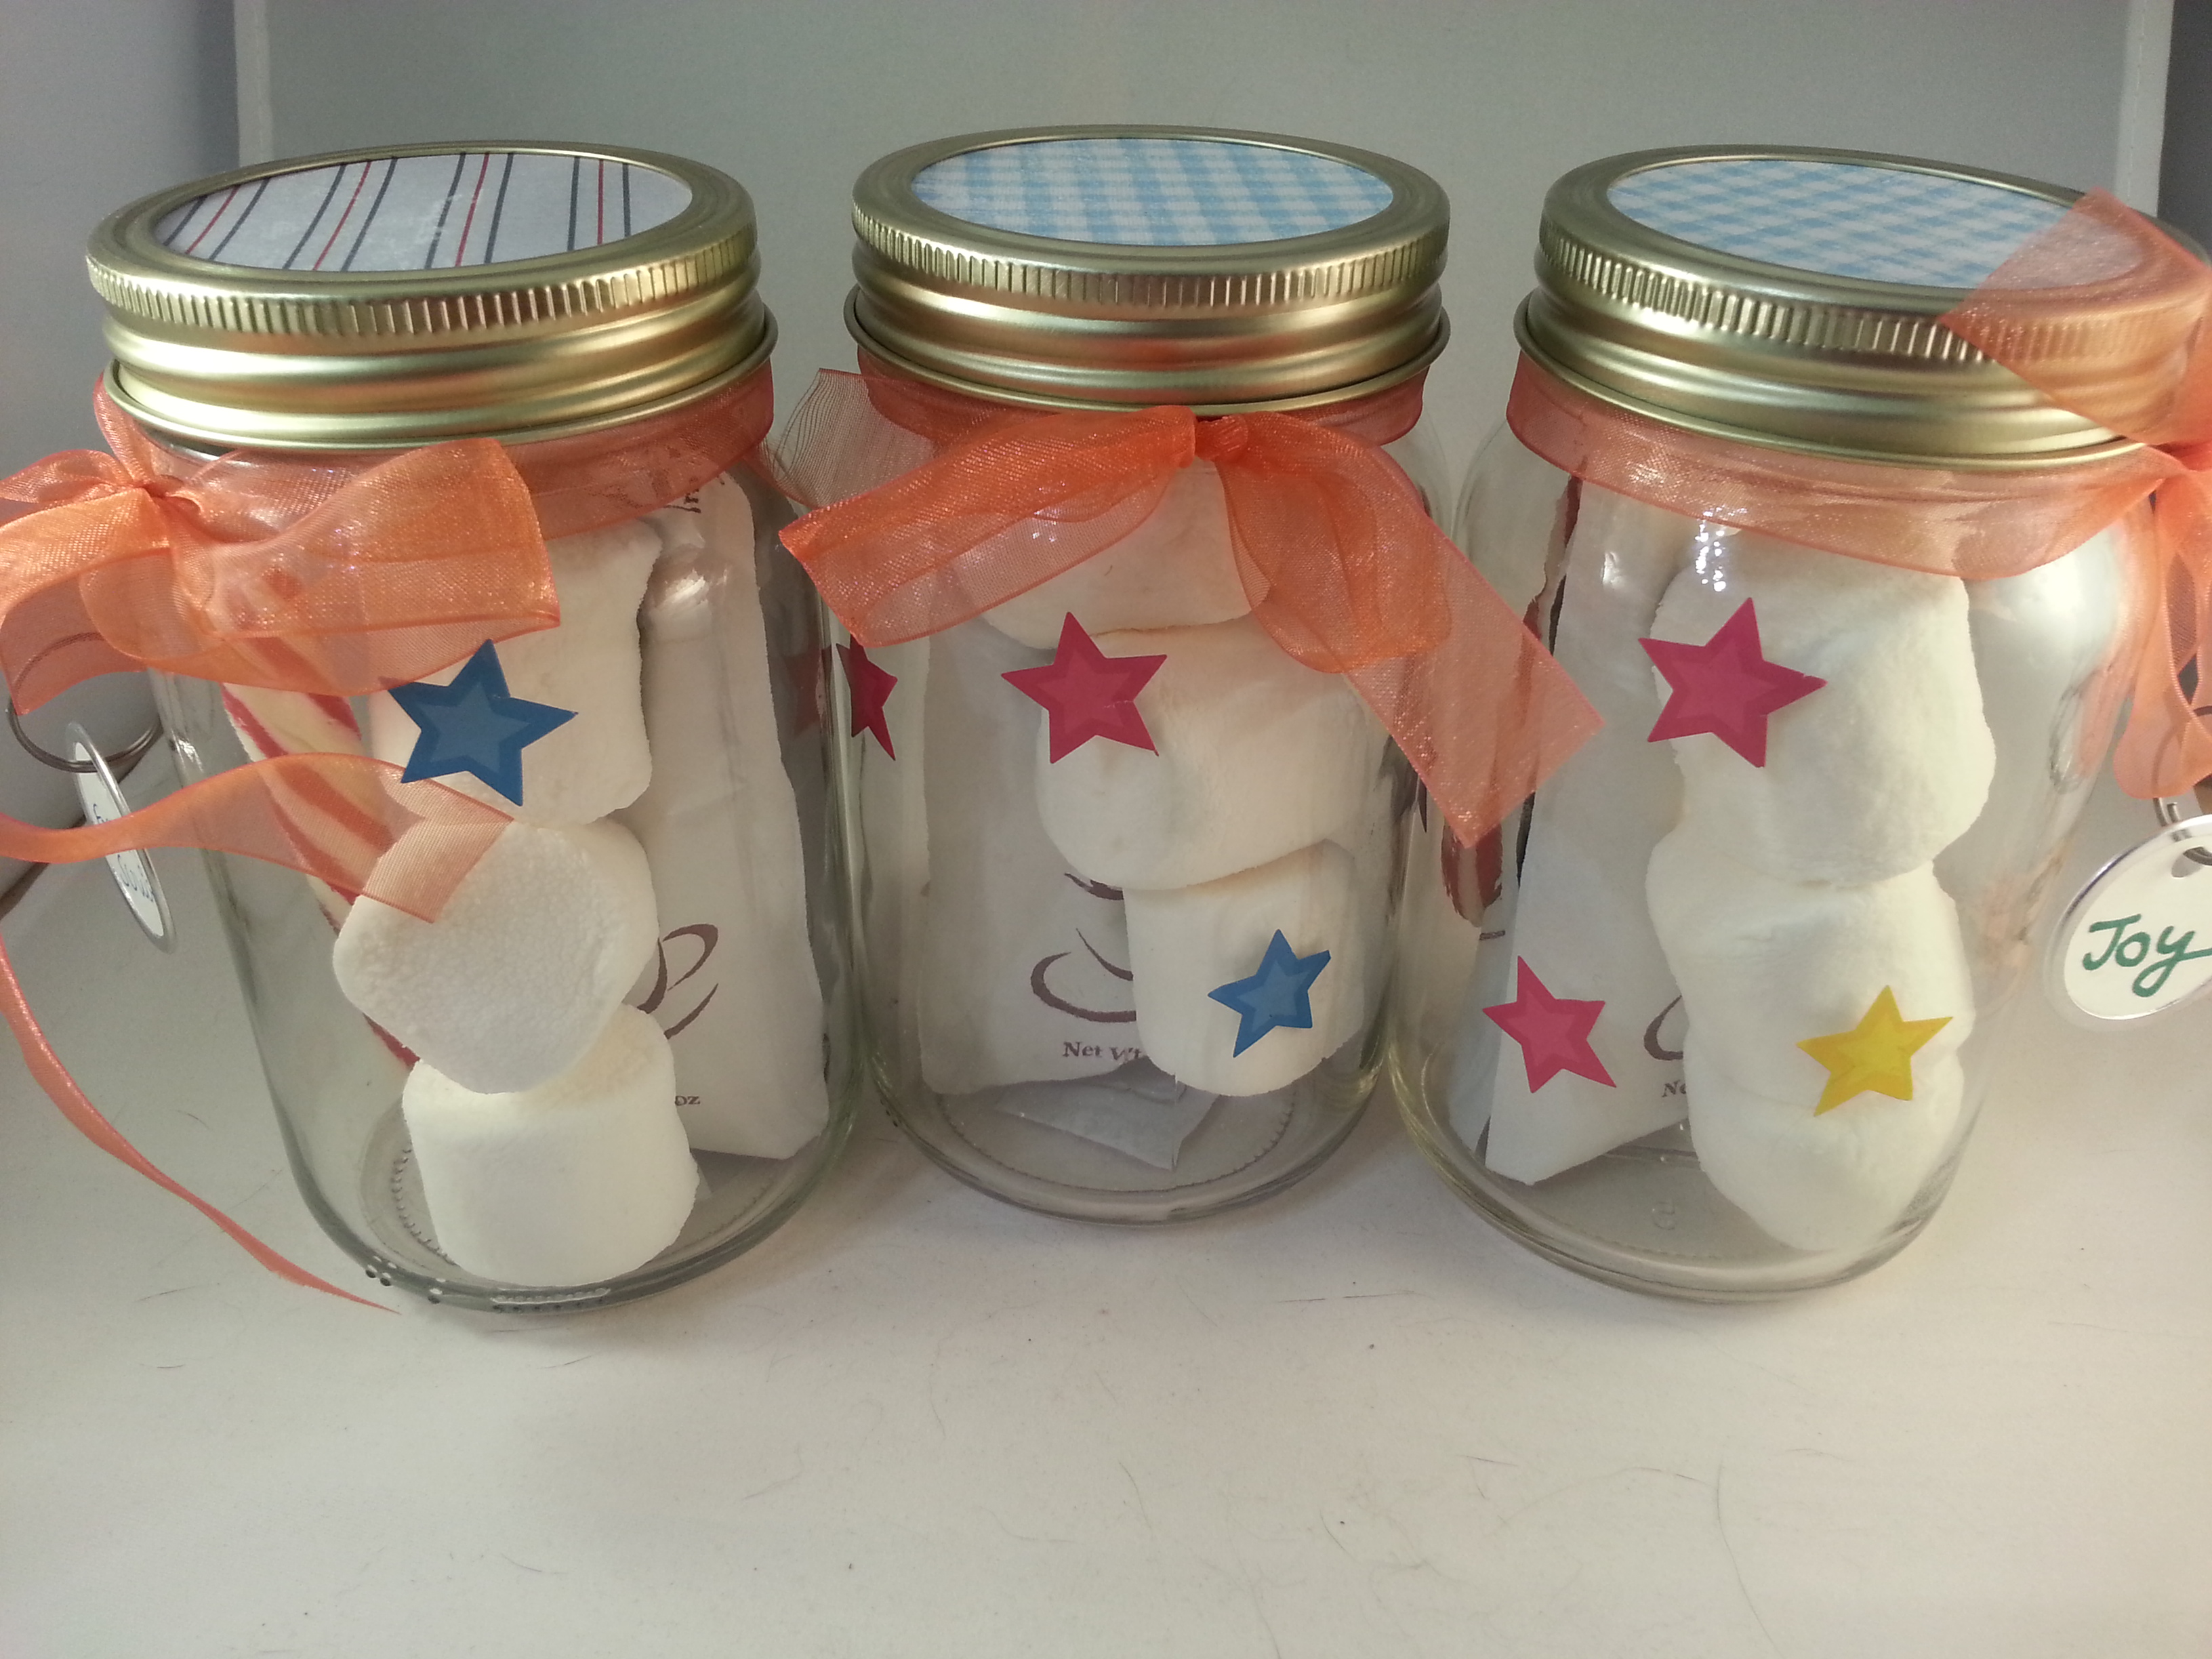
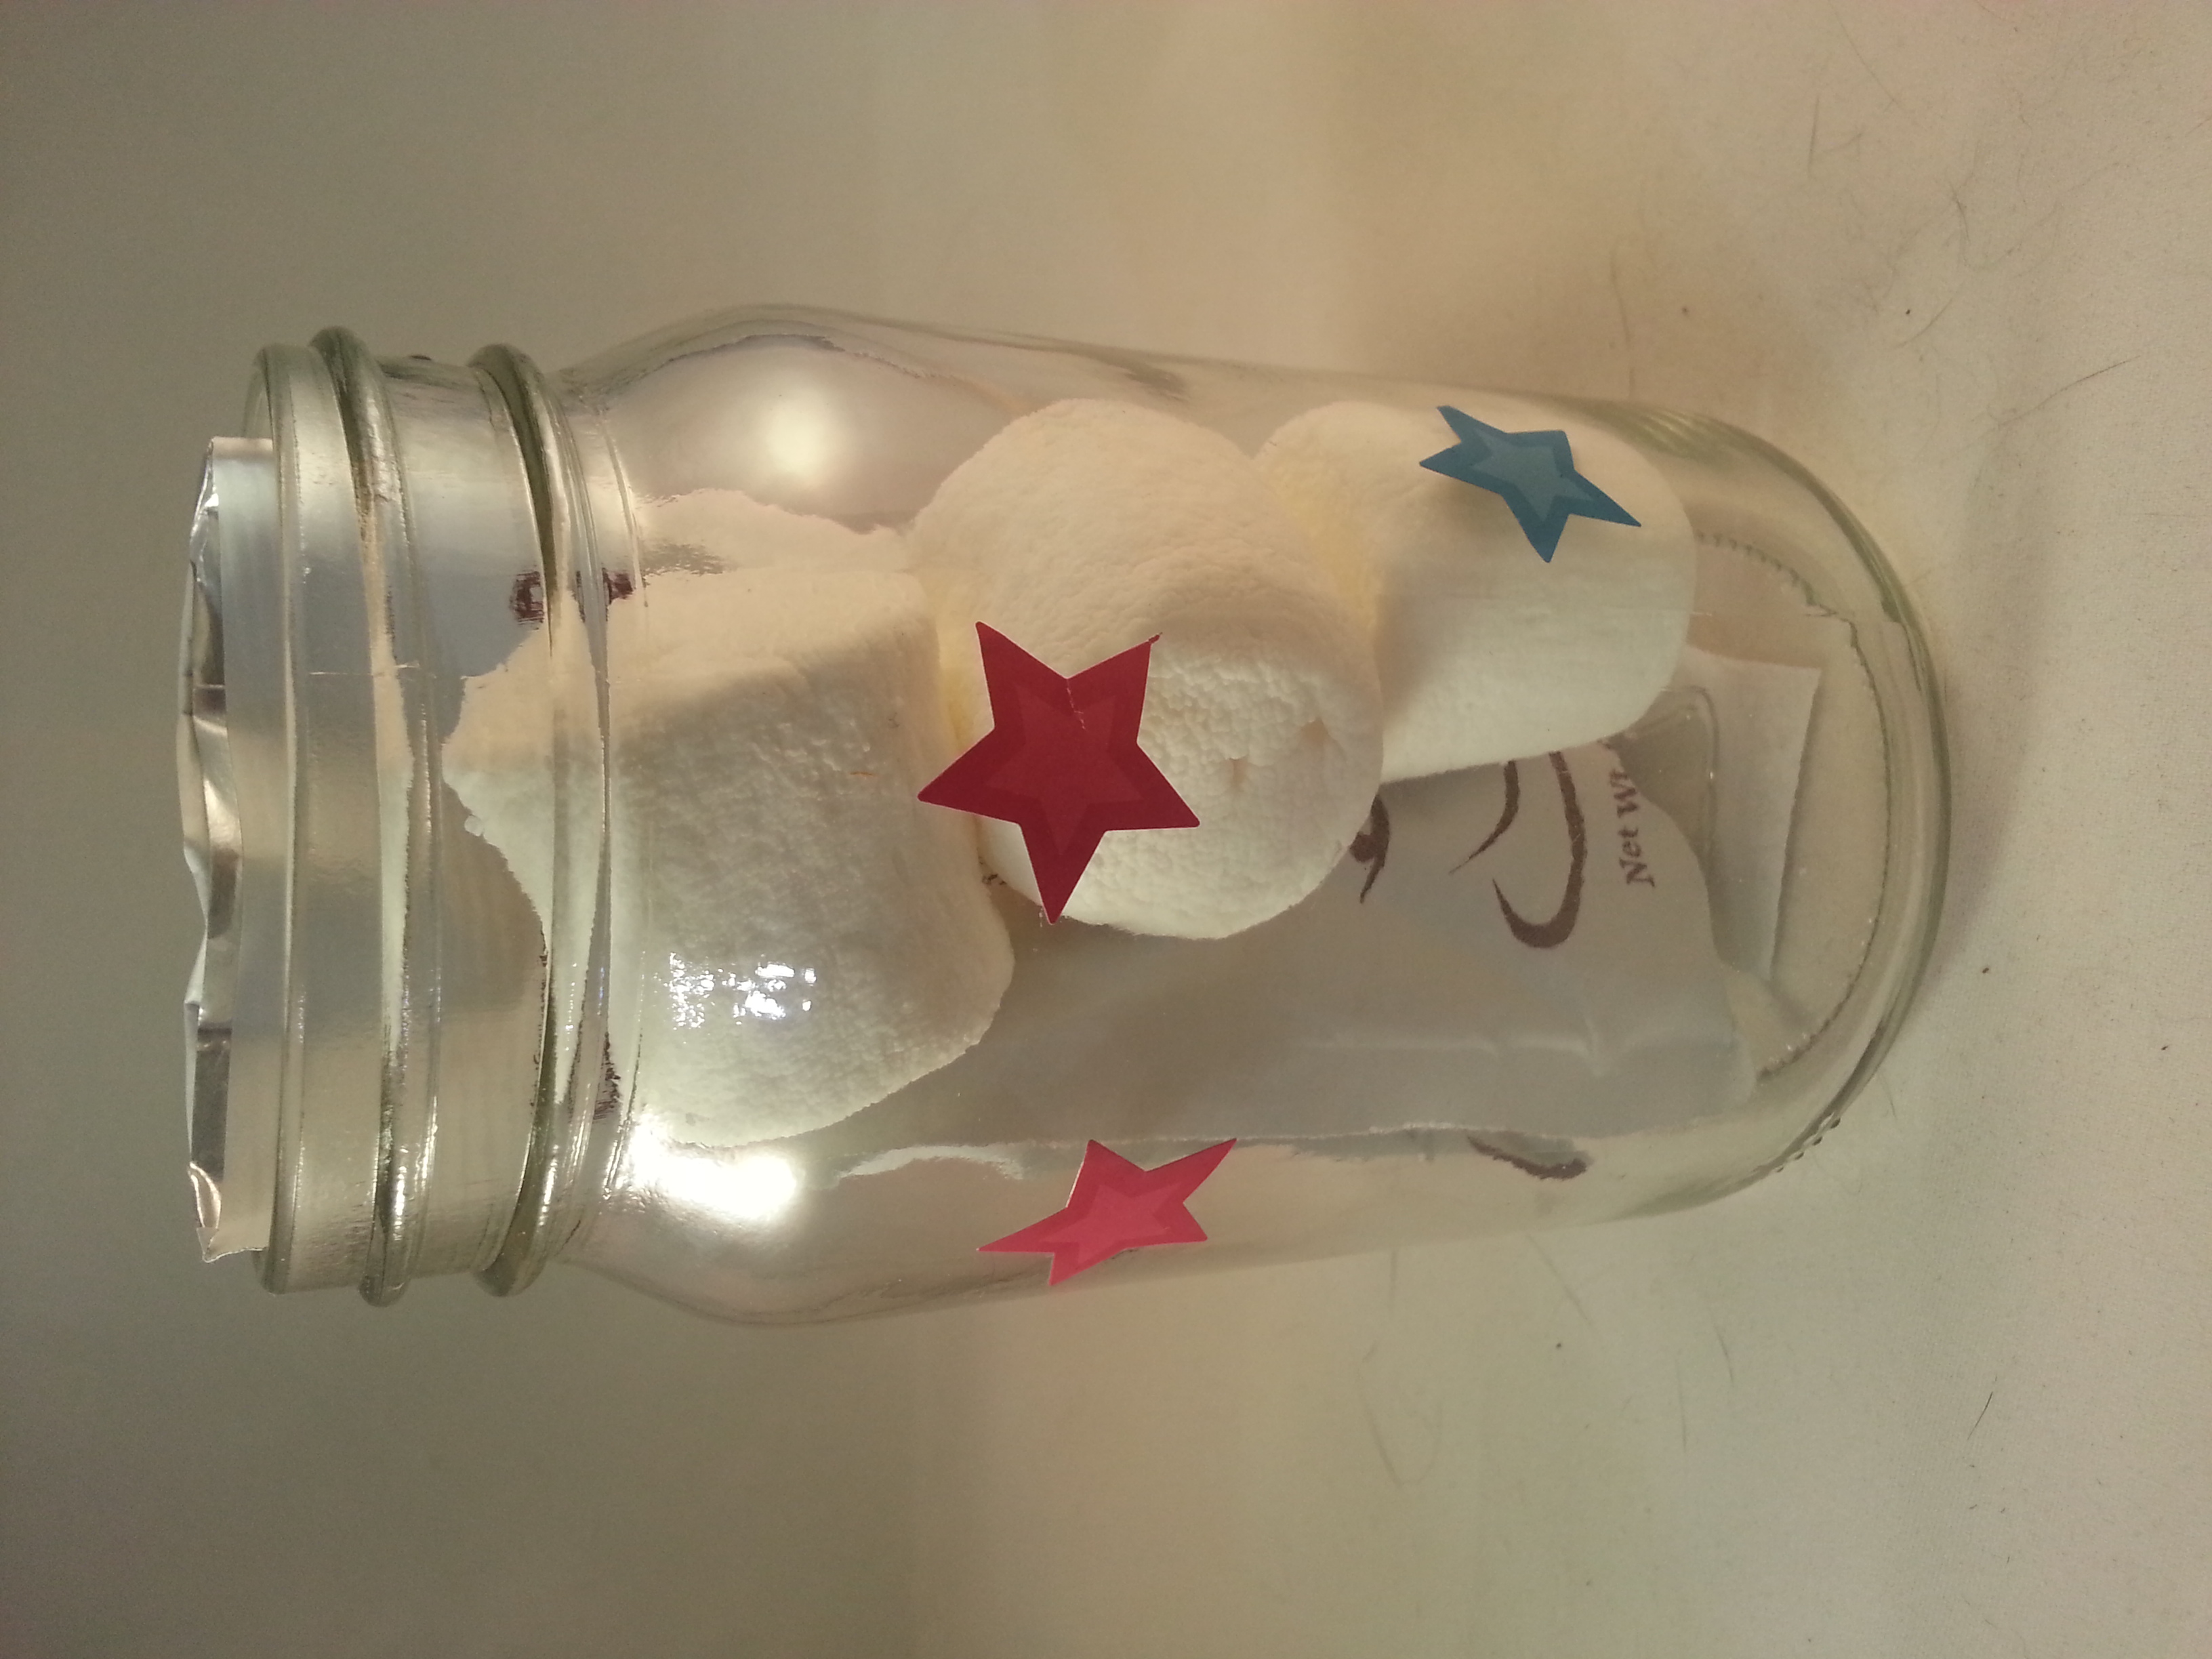
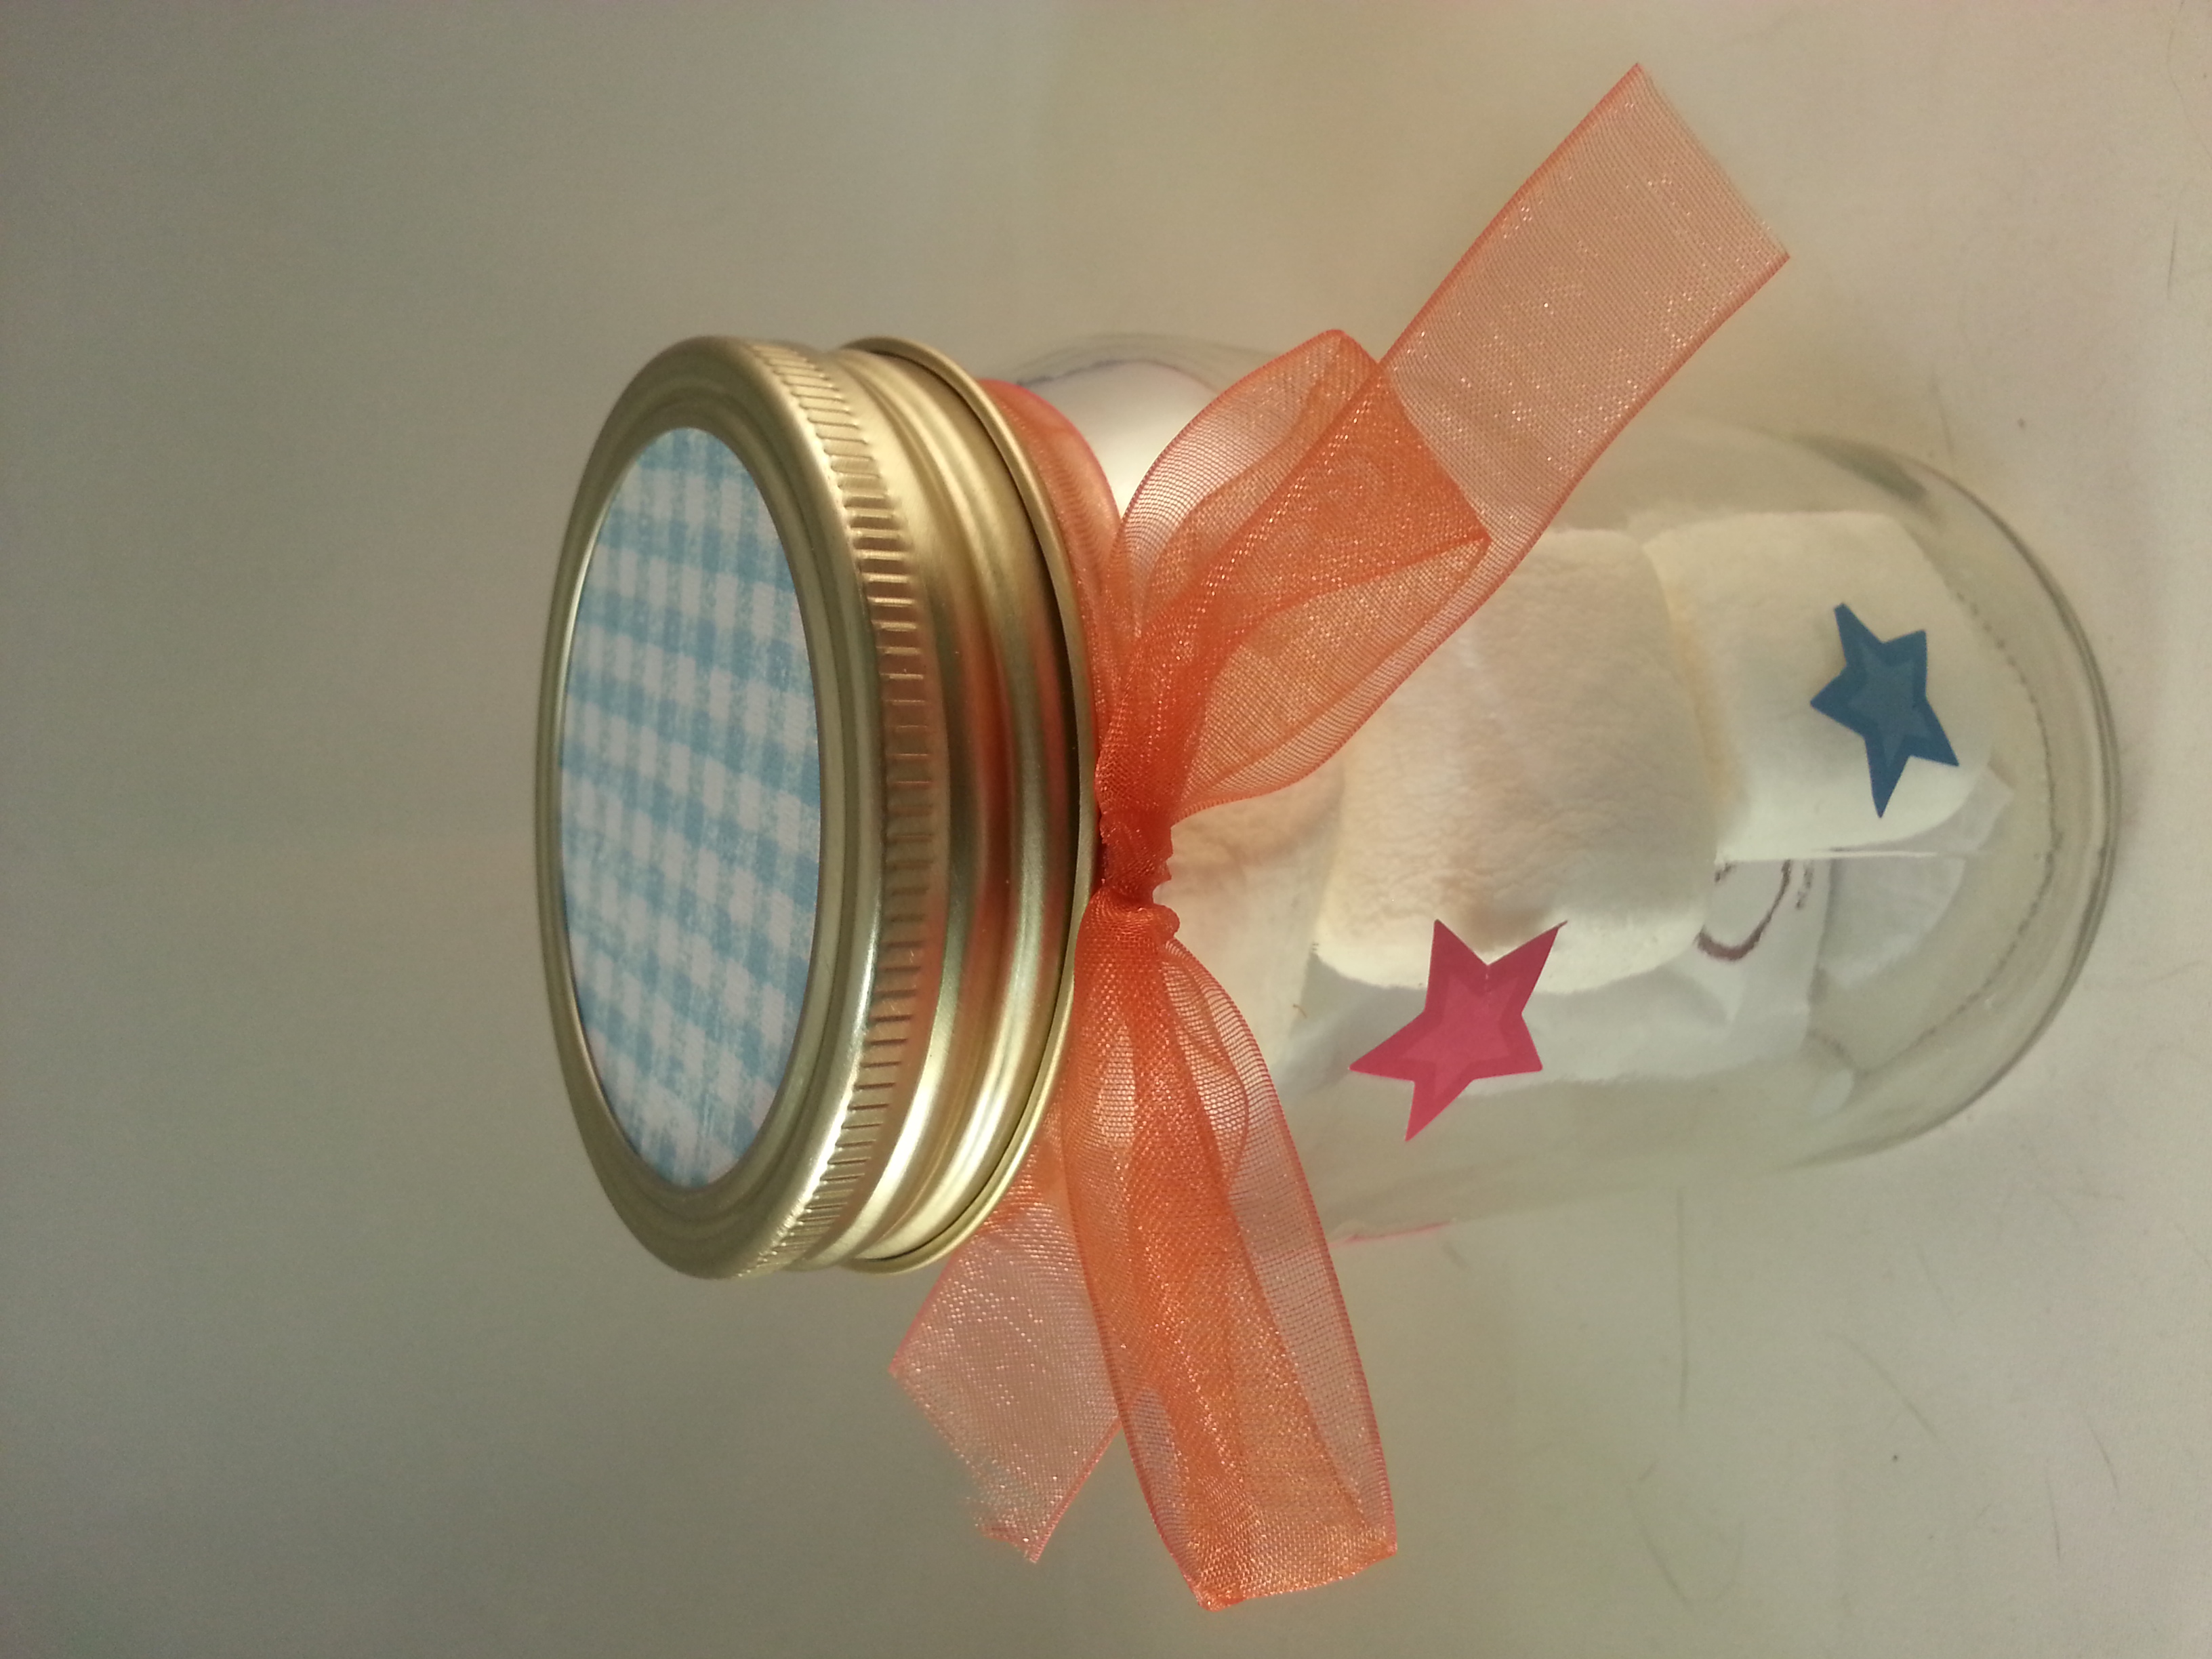
Start by adding some decorative stickers to the mason jar and add some marshmallows and hot drink mixes.

20141218_205936

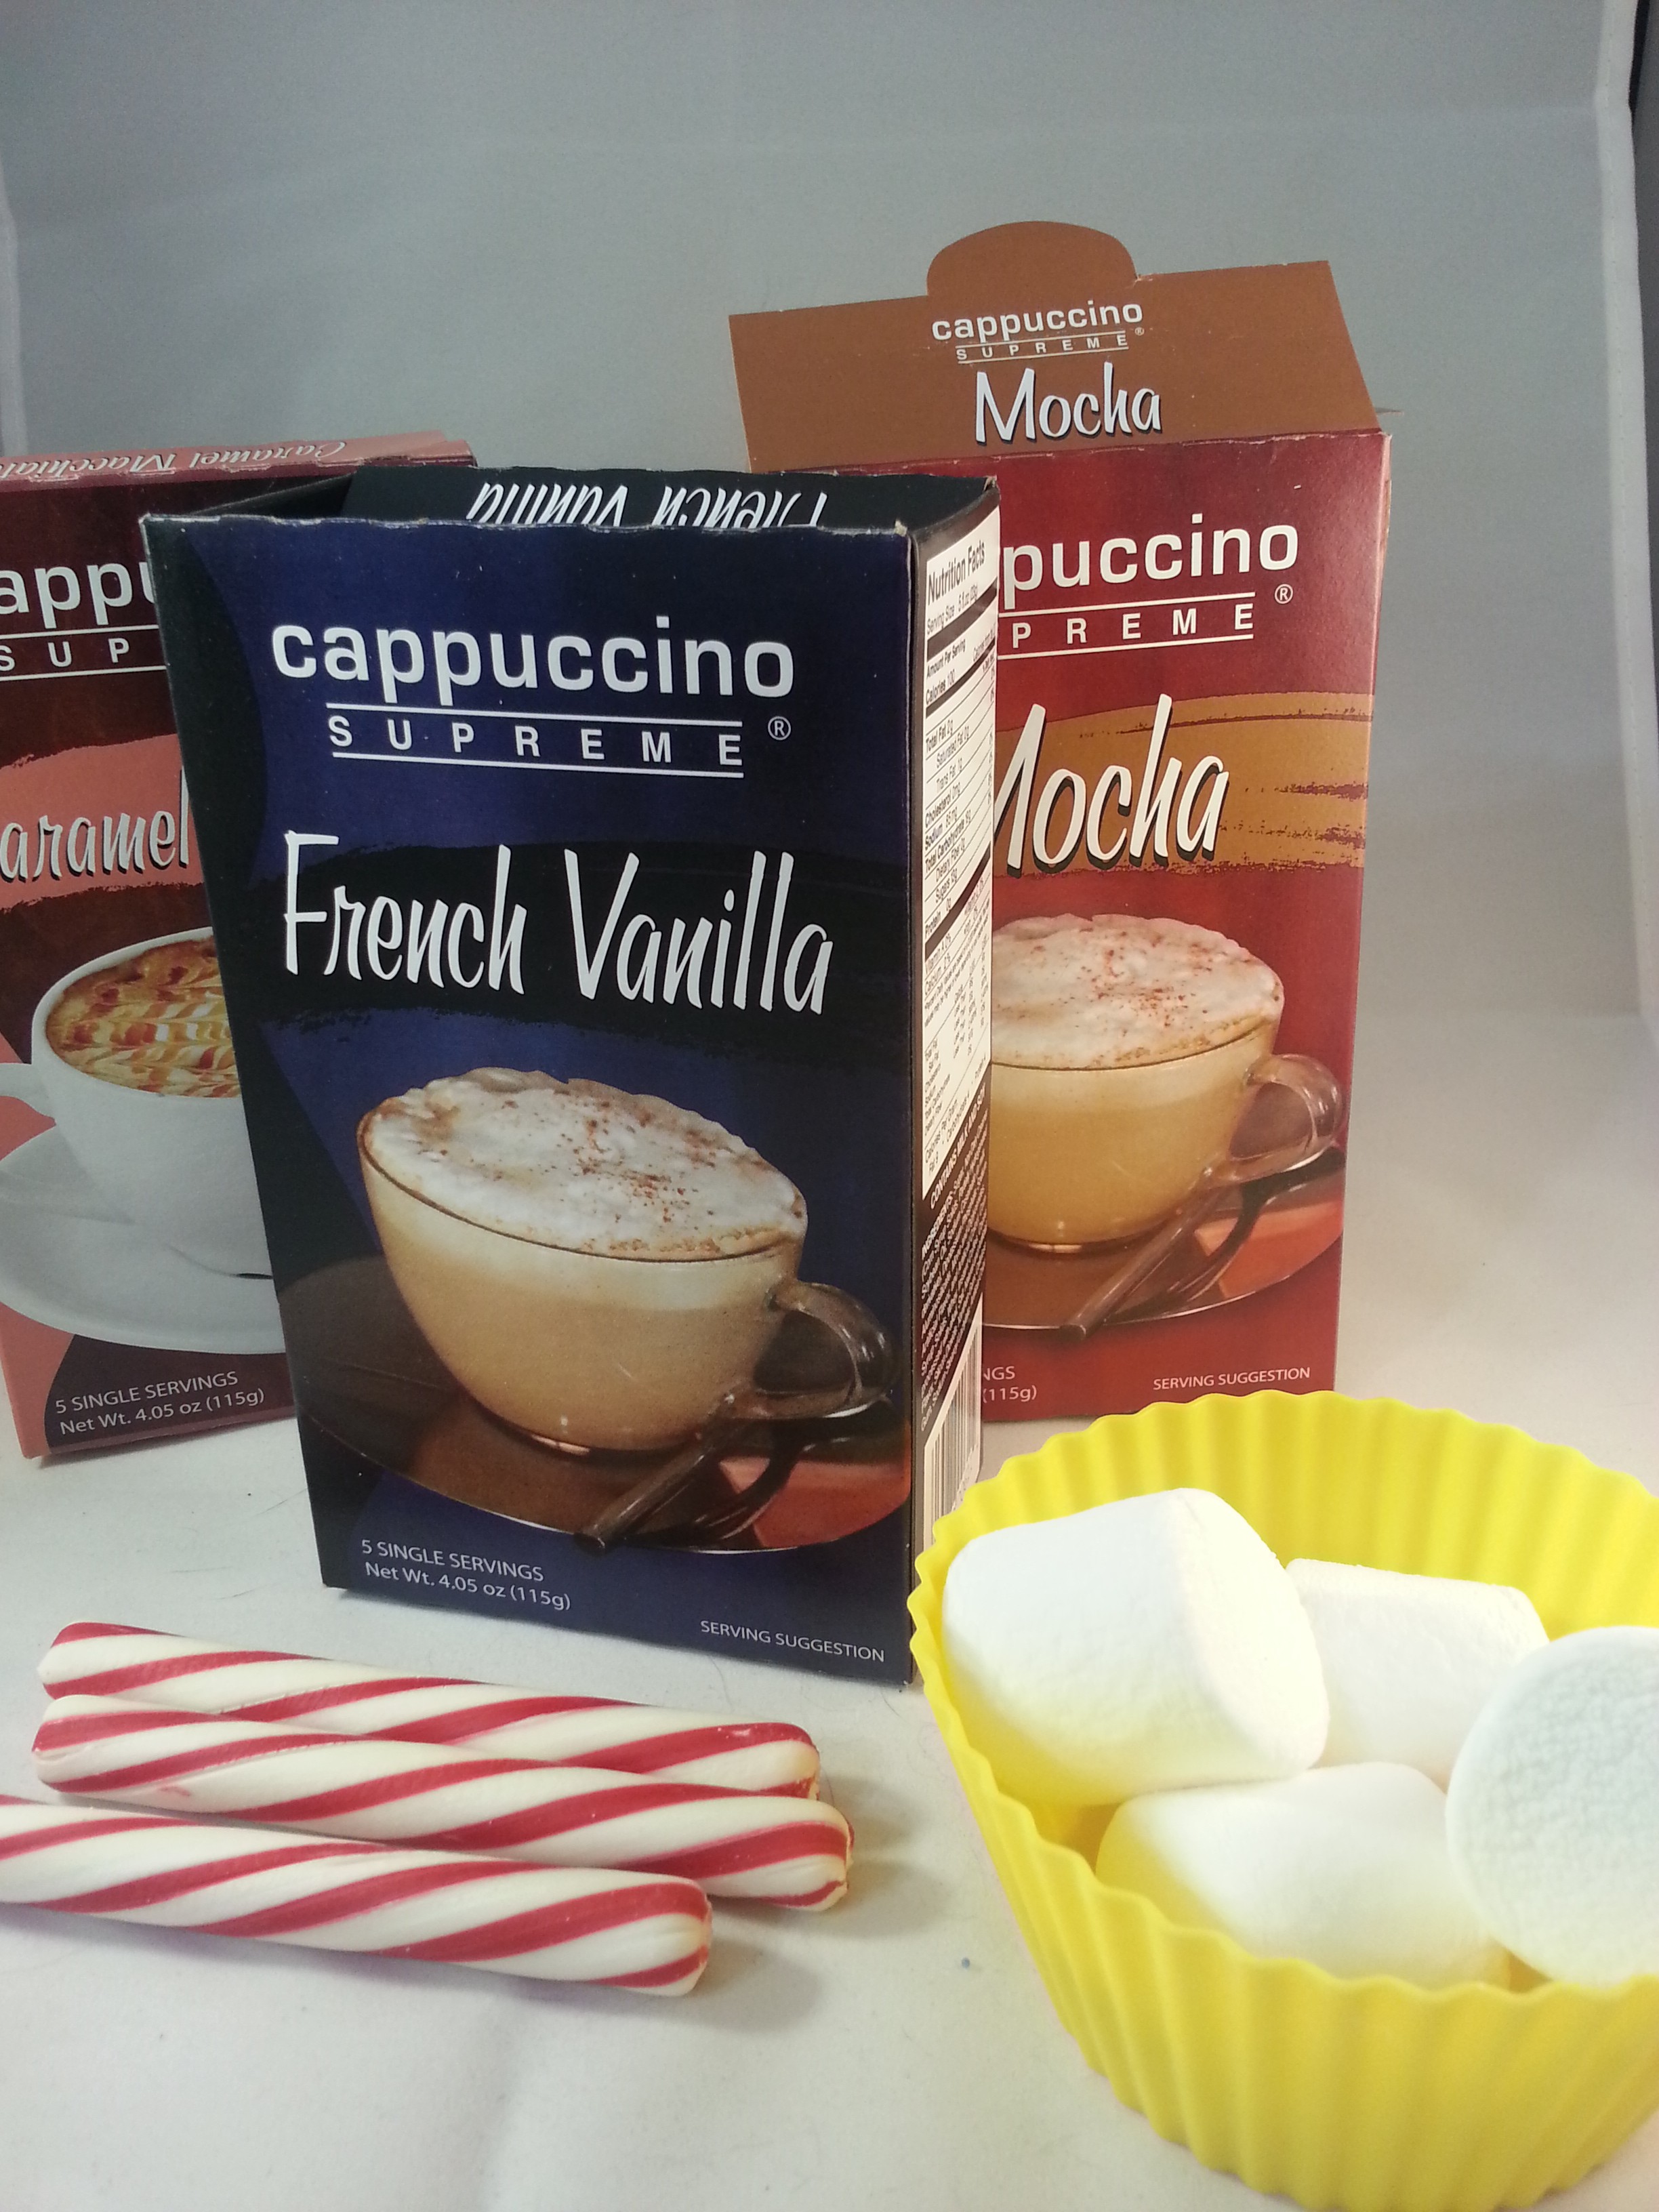
These are some of the drink mixes that I got:

20141218_212727

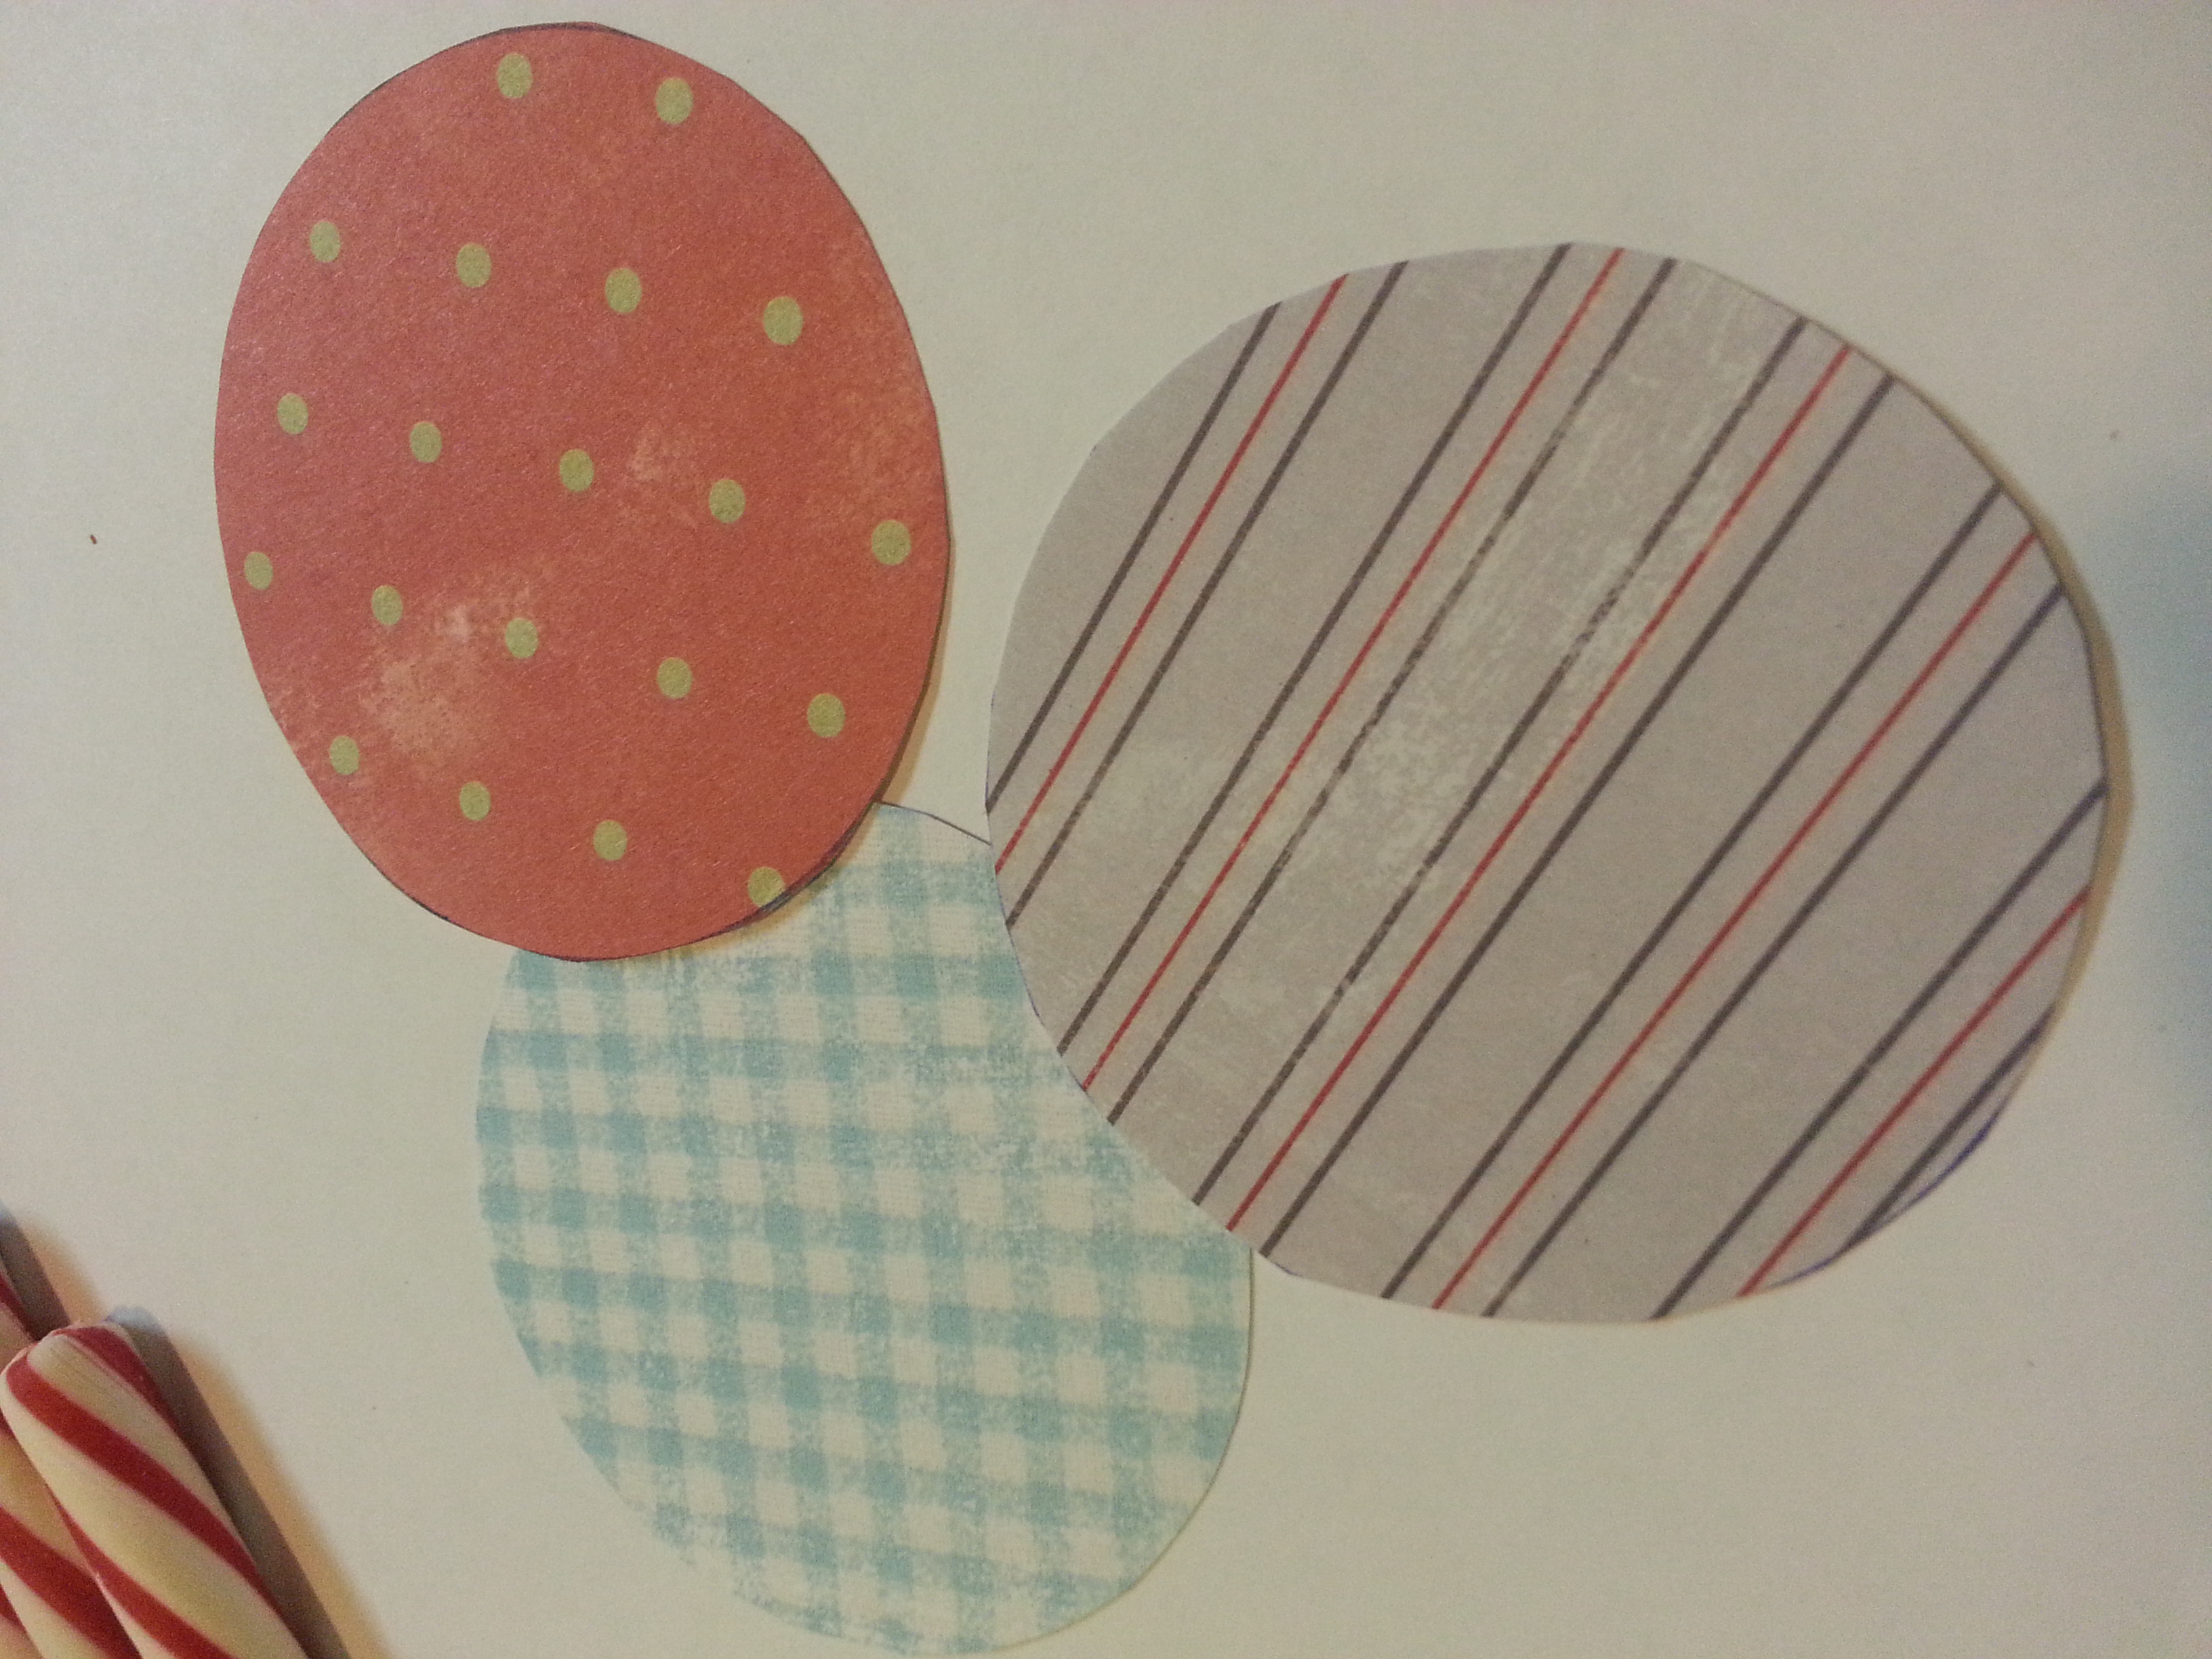
Then I cut circles out of some scrapbook book paper to add to the lids of the jars.

20141218_205701

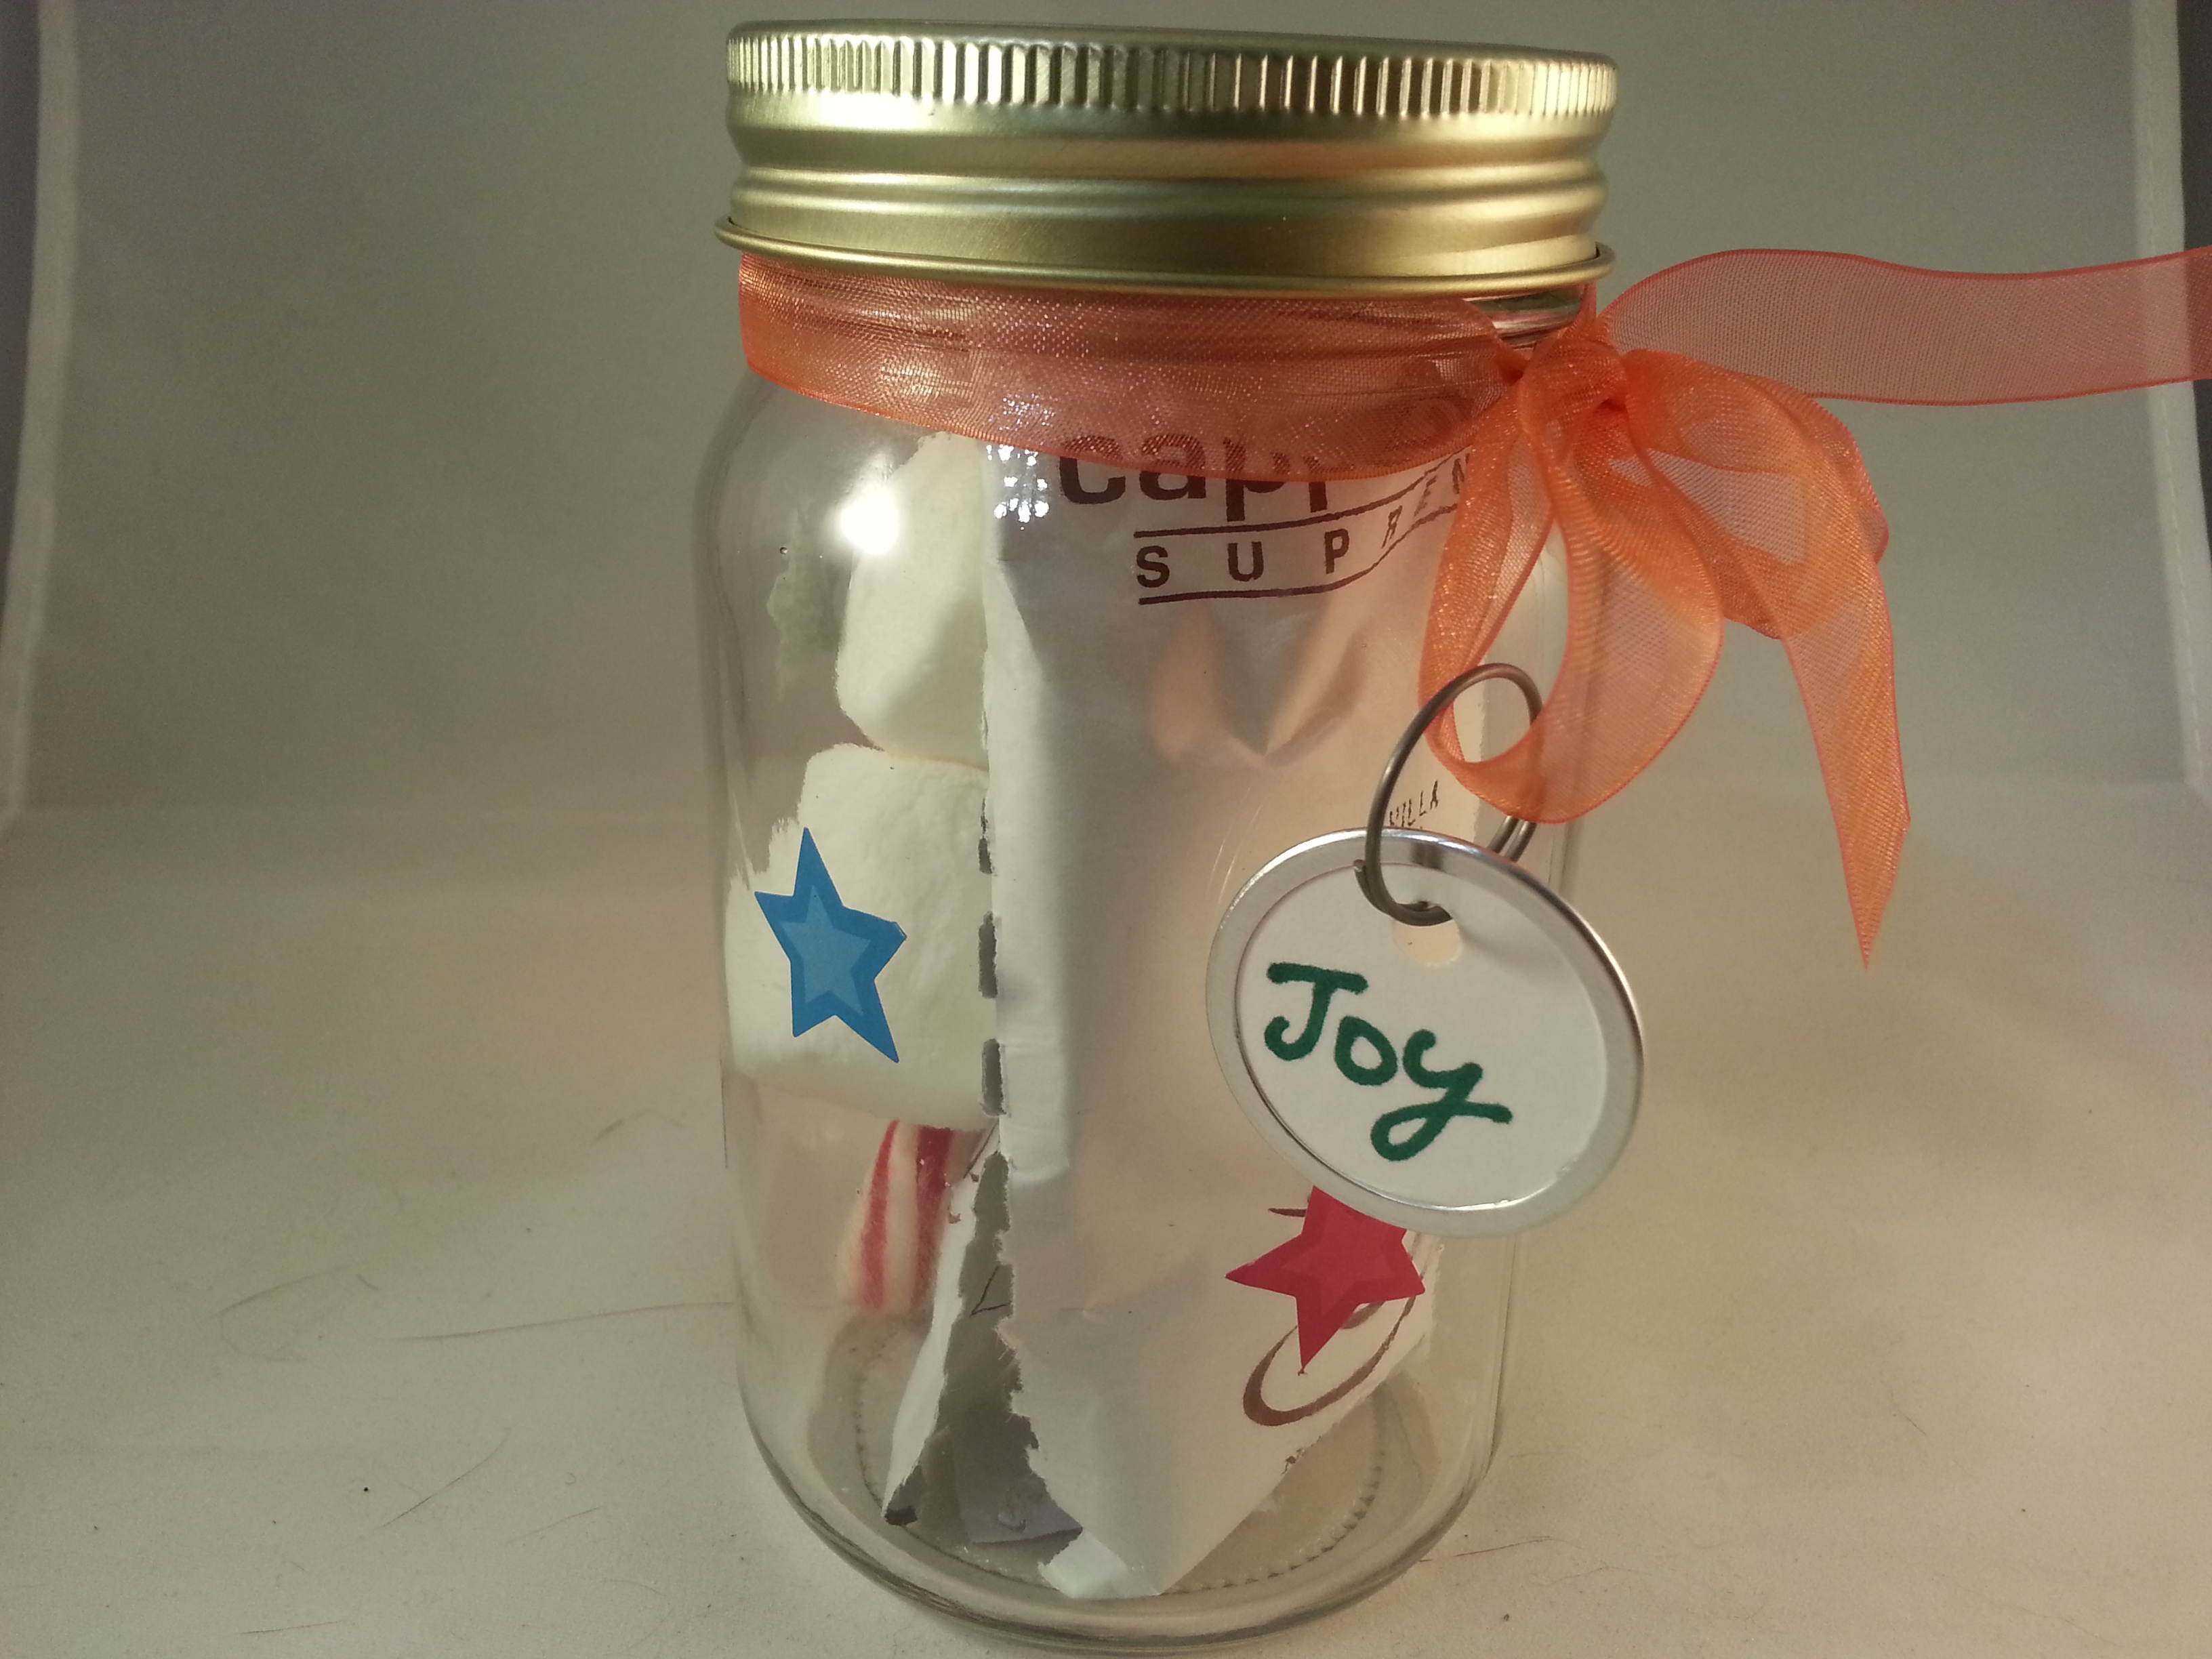
Insert the candy canes and close the pretty lids. Tie ribbons to the top and you’re almost done.

20141218_210014

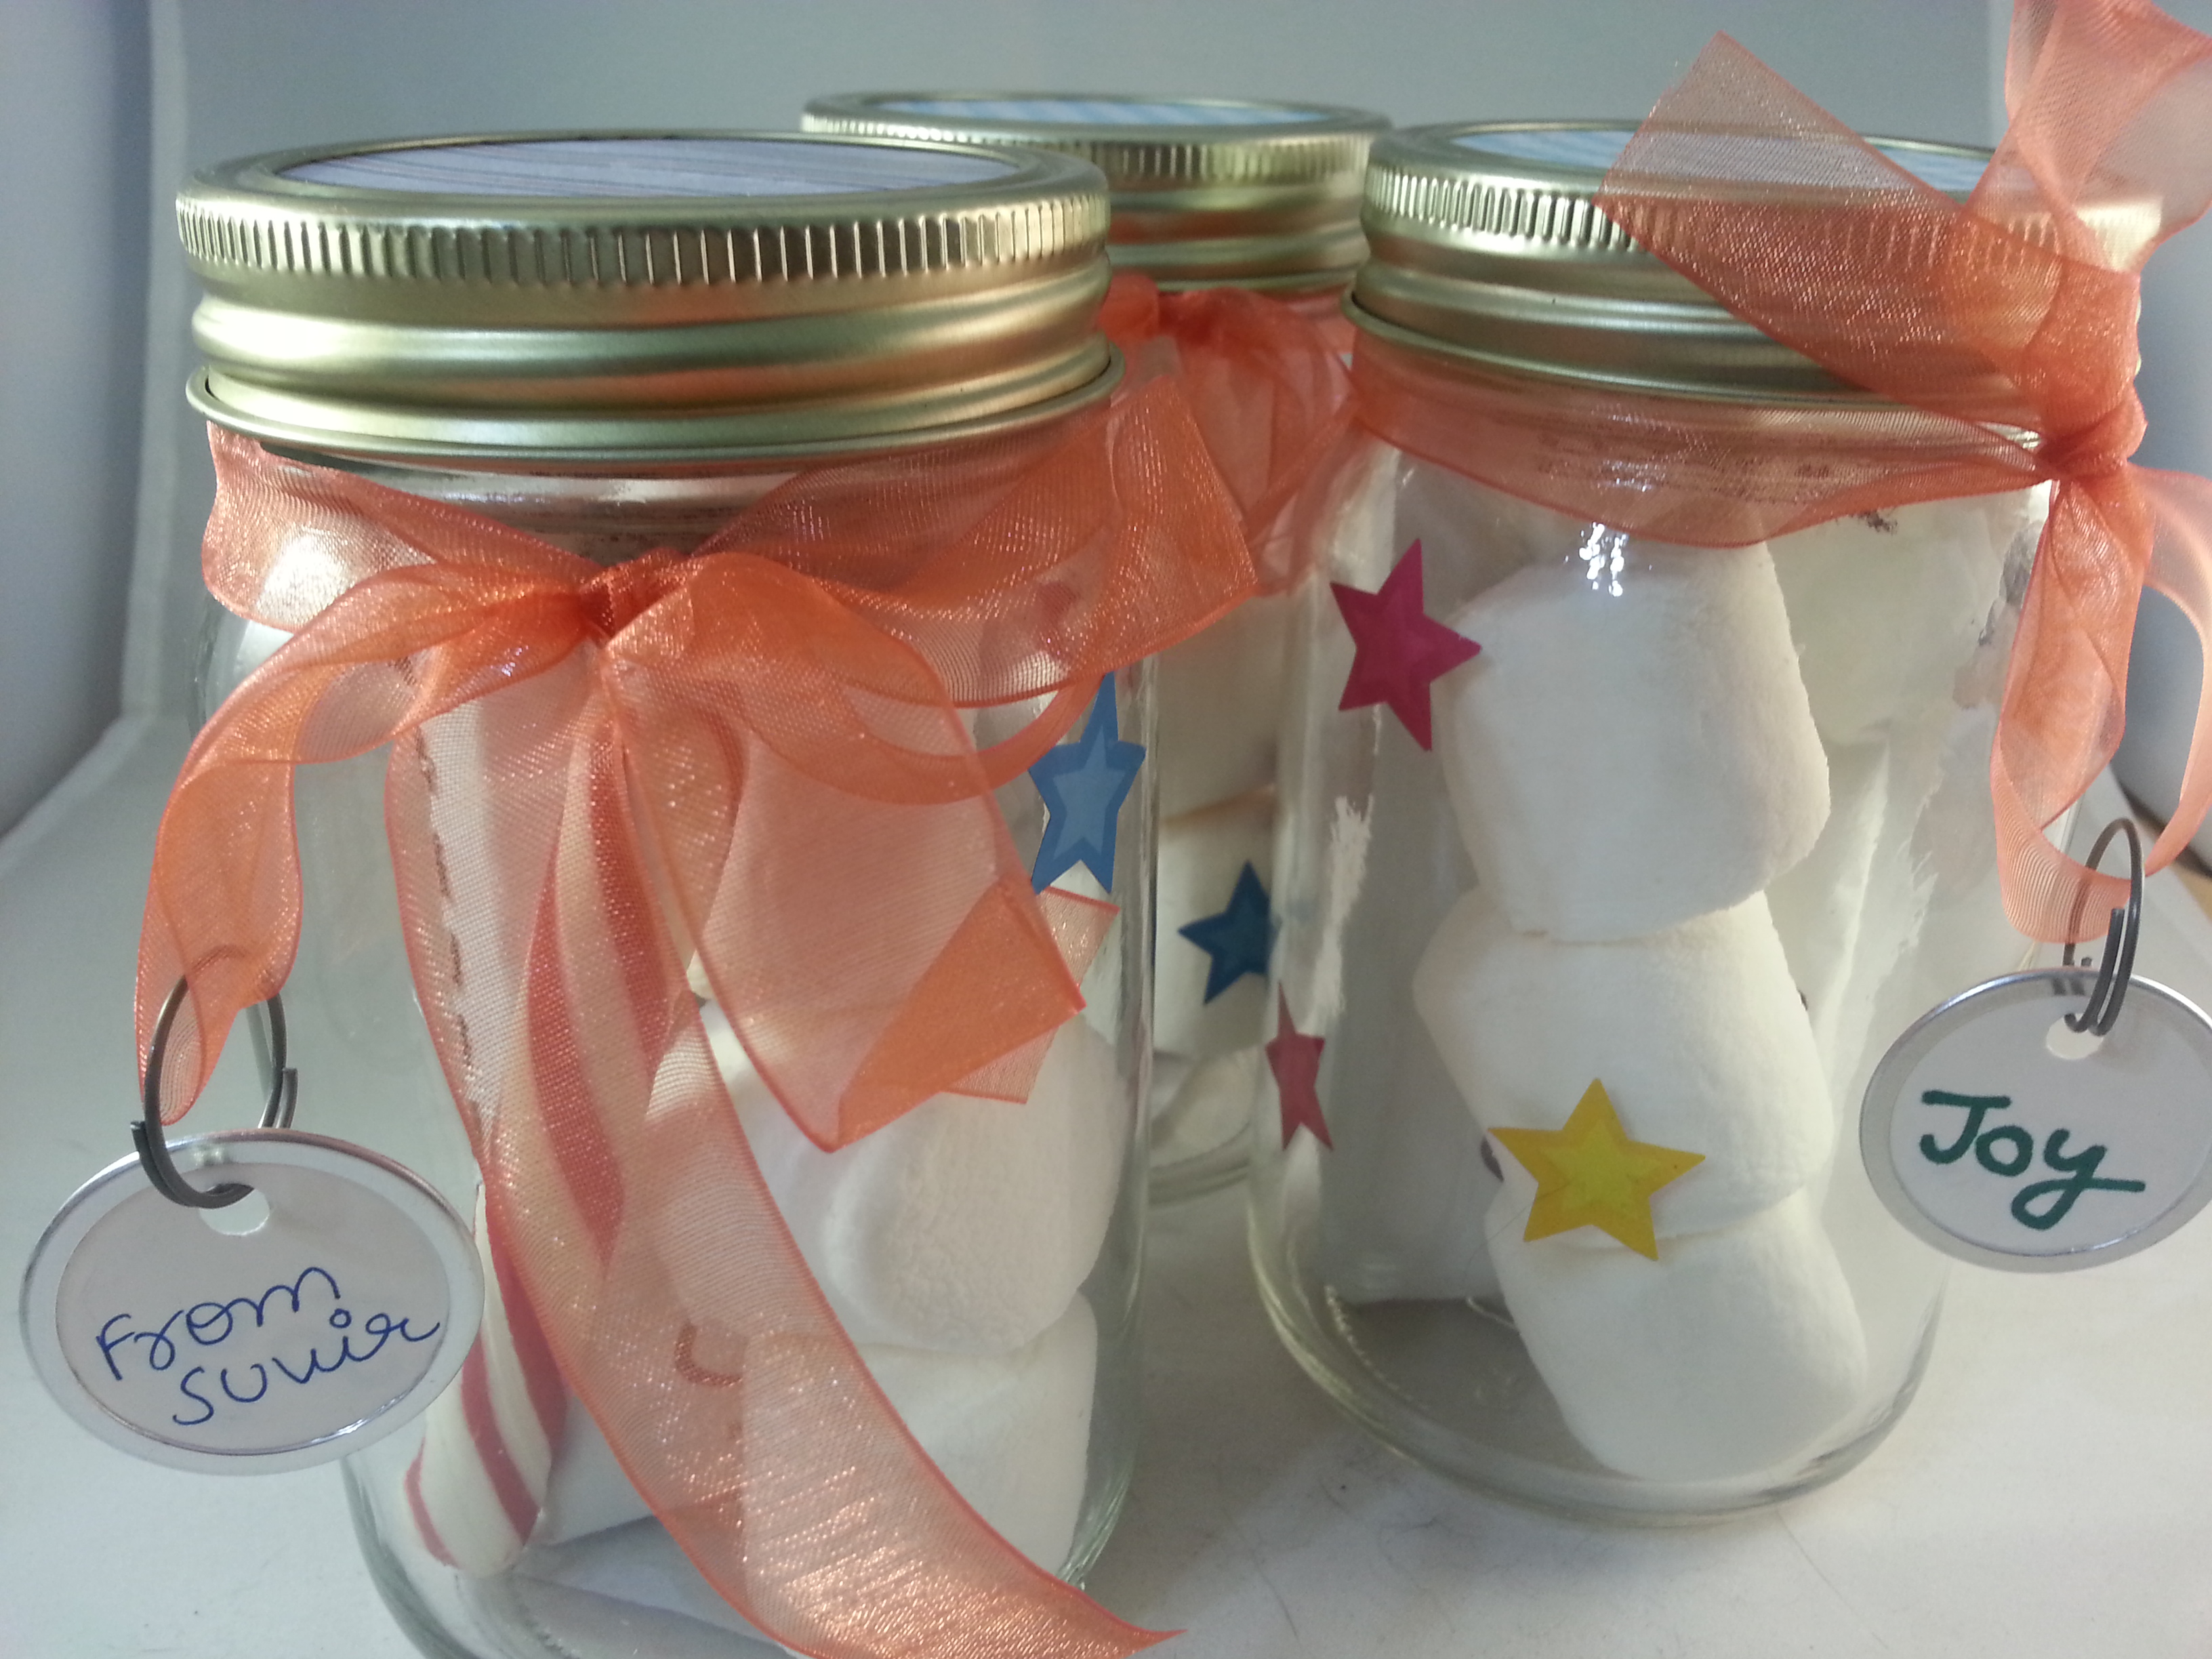
Now to add a little message I hung the little key tags to the ribbons like so:

20141218_212331

And our homemade holiday gifts are ready:

20141218_212442

20141218_212429

Hope you enjoyed!  Happy Holidays!!


No Sew Robot knots blanket for kids


I was looking for a blanket solution for my s

on who goes to preschool and still takes an afternoon nap (thank God!!). You know what I’m saying right! He sleeps well in school and my husband and I look forward to his naps over the weekend. Anyway, I wanted to make him a personalized blanky for school so that he feels happy about it and that it doesn’t get mixed up with the other kids’ stuff. Also I wanted him to use something appropriate for the weather. I brought home his thick fleece blanket couple months back but then he was using a thin cotton one which I thought was not enough. After all it does get little cold with the AC even in the hot months. So this is what I came up with:

20140622_203602


Things you need:

  • Cotton fabric
  • Measuring tape (optional)
  • Scissors
  • Felt in different colors of your choice

I started by folding the fabric in half, right side facing up.

20140622_201203

Then I roughly cut about 2 inches all along the edges except for the edge that I had folded. I got a little lazy here but you can separate the two sides of the fabric and snip on all four sides instead of just three like I did.

Then, I just tied regular knots attaching both sides securely.

20140622_203615

The blanket is almost done but Suvir wanted a “Robot blanky” so i decided to cut out some fun shapes using felt and just glue it on with fabric glue I bought at the local craft store.

we learn some shapes while cutting the squares, circles and rectangles for the robot’s face and body parts.

20140622_192203

This became like a fun Sunday afternoon activity for both of us. Well, he did get distracted every now and then.

20140622_192641

I used the fabric colors to write his name.

Time to attach the little legs.

20140622_193352

20140622_201008

And the blanket is ready!!

You can make any fun shapes that you like and just glue them on with fabric glue. I was feeling too crafty at that moment so I ended up sewing the robot to the sheet. The two layers make the blanket warmer which is good. I have washed it a couple of times and the knots stayed intact.


DIY 4th of July Shirt with Felt

My son needed to wear Red Blue and White colors to school to celebrate the 4th of July so I decided to make him a shirt using some supplies I had at home. What you need:

  • A Red, Blue or a White T-shirt
  • Red, Blue and White felt
  • Fabric Glue or needle and thread

glue I found an old blue T-shirt I did not mind ruining. Luckily it even had red piping on its sleeves. I cut out a rectangle out of red felt cloth. Then cut three stripes out of the white felt cloth. IMG_20140703_085703 Apply fabric glue all over the edge of the red rectangle and press it on the shirt. Now glue on the white stripes. pic20140703105352 Cut out a square of a darker colored blue felt cloth. Glue on to the red rectangle. Almost there! Now with the left over material from the white stripes cut out a few stars. They need not be so neat. Or at least mine weren’t but that’s okay. IMG_2014070315233Keep it for 2 to 4 hours to set. I kept mine overnight.

And Tadaaaa! ! Someone’s ready for the 4th of July weekend!

IMG_2014070324524

How to display your kid’s precious art work

We as parents get so excited by our young occupants’ art but often wonder what to do with all of it. I sheepishly refer to my car as “the gallery” as art projects tend to accumulate there after school pickup. It’s everywhere! In the side pockets, in the glove box and on and under the seats. And one day…… I opened the car windows while taking my son back home. Yes, that is when I decided enough was enough I needed to do something with all that precious artwork. There are a number of ideas out there but this is what worked best and quickest for me, for now. It took me less than 10 minutes to complete this project. What you need:

  • Clothesline pins (found at dollar tree)

c_pins-300x300

  • String or yarn
  • Art work

I tied ends of a yarn to two thumb pins and pinned them into the wall. Make sure they are high enough so your tiny tots cannot reach them. Then I just used the clothesline pins to attach the art work. As simple as that.

20140701_142207

20140701_142216

20140701_142201

You can keep replacing the art work. I hung these up in the family room so my son can look at them and feel proud each time!

Hope this post was helpful. Do subscribe and leave comments and how you display your kids’ art.

How to make a Hair Bow- Tutorial


How to make a cute easy Hair Bow clip I love bows. Anything with a bow… I must have it. A bow ring, bow print blouse, bow head band etc etc. In today’s tutorial I am going to show you how to make a simple Hair Bow clip. These are super simple to make and take only a few minutes if you have the supplies ready: You will need:

  • Hair clip backing (sold in multiples at Michael’s, Joann’s or other craft supply stores)
  • Fabric of your choice (buy a small piece or use a leftover fabric from another craft activity etc)
  • Glue gun
  • Scissors
  • Needle and thread (optional)
  • Measuring tape (optional)

20140530_212912 Spread your fabric on a smooth surface. Iron if necessary. pic20140530221301 Depending on the size of your backing clip or just depending on how big or small you want you bow to be, measure the fabric and cut a rectangle. Next, turn over the rectangle piece of fabric so that you are looking at its back and then fold it as shown in the picture. If your fabric is soft and flimsy, use the glue gun to secure it in place. Mine is a fairly thick cotton fabric so I did not need to do that. Fold this towards the middle now and secure it with glue gun. pic20140530221050 pic20140530221122 20140530_214309   Now, to hold it tighter in the middle and give it a better shape cut a small strip of fabric and wrap it around the middle. You can use some from your leftover. I decided to use some felt. pic20140530221154 Add some glue to the back of the clip and while the glue is still wet, attach the bow. 20140530_215050 Tadaaaa!  Your hair bow clip is ready!   20140530_215104 Here are a few more that I made. IMG-20130831-WA0003IMG-20130831-WA0004   And my cat Kitta loves bows too!

Too Cool For School

Too Cool For School, After School BB Foundation Lunch Box #2 Review

Oh My God! Look what I received in mail today. Yes! this is the cutest BB cream I have ever seen. And the coolest. Too Cool for School is a Korean cosmetics brand that I discovered online while looking for a good BB cream. The packaging is so cute and girly and that is what attracted me to it. I decided to give it a shot. I ordered it on eBay for around $20 with free shipping from Korea. It does take about 3 weeks to get to the US. It is also available on Amazon.

The Packaging

The Packaging

This BB cream covers flaws and creates smooth and illuminating skin at the same time. It is a 3-in-1 product which is great for travelling. It comes with a concealer and highlighter on top with BB cream at the bottom. A mirror is included inside the cap which is very handy.

The Bottle

The Bottle

I like the cute red ribbon that you use to open up the cap. How cute and unique is that, right! I cannot get enough of the girl’s face on the plastic bottle. She is so adorable.

A closer look

A closer look

IMG_20140318_104809

It is lightweight and good for everyday use. It spreads evenly and easily. Just like a lotion.

How to Apply:

  1. Apply the concealer where needed
  2. Apply the BB cream
  3. Apply highlighter to the cheek bones, forehead and other area to highlight
The Spatula Dispenser

The Spatula Dispenser

The BB cream is dispensed using a spatula at the end. I only wonder how you would use it when you reach the end of the product. I would have preferred a pump bottle. But that is the only complaint I have. The texture looks thick but spreads smoothly when applied. I am also happy with the coverage of the concealer. The highlighter reflects well too.

How it looks

How it looks

I have just used the BB cream and the highlighter in the picture above. I have not used any special lighting but you can tell how the highlighter looks when applied.

This BB creams comes in two shades. #2 being the darker one. I think for the price of around $20, this is totally worth it, considering you are getting three products in one. There are a lot more products in this line and I am excited to try those as well.


What do you think about it? Have you tried it! Do leave me a comment.


Cute Cosmetics

Cute cosmetics

Cute cosmetics

wpid-20140301_214730.jpg

I’ve always been a fan of cute packaging, especially in cosmetics. I will discuss all the products you see above in my following posts but this post is about Peripera’a Peri collection.  My recent favorite has been the Korean brand  Peripera for its insanely cute design and decent quality products. This brand is not as famous as Etude House which I will talk about later, but you have to check them out! Mari Kim is the artist for Peripera’s packaging.

Peripera's Lip Tints

Peripera’s Lip Tints

Peripera is famous for their lip tint range. They are truly adorable and Kawaii. Even though they were much more expensive in Japan where I first discovered them, I could not stand the cuteness and ended up buying 3 of them. They are available for a much better price on ebay and Amazon. This is what I got:

  • Peripera Peri’s Tint Jelly Stick in Orange Stick
  • Peripera Peri’s Tint Milk in Milky Peach
  • Peripera Peri’s Tint Water in Orange Juice

Don’t know how I landed up with all orange shades, but each of them is a different kind.

Milky Peach

Milky Peach

The packaging

The packaging

Jelly Stick: This when first applied does not give any color. But it changes to orange with time. I like how natural it looks on my lips.

Tint Milk: It comes with the spatula applicator, which is easy to apply and control the quantity you want. It smells like Peach and it easy to blend. The consistency is little thicker than the Tint Water as you can imagine.

Orange Juice

Orange Juice

Tint Water: This is very watery. If you have used Benefit’s Benetint you would know what I am saying. You can apply this with the Spatula applicator and blend it with your finger. The color is very pretty but the taste is not as sweet as Orange. It is rather bitter. The packaging does not mention it but I do apply this on my cheeks. Actually I like it better on my cheeks than on my lips. This is a much cheaper alternative to Benetint. You need a very small quantity but must make sure to spread it quickly on the cheeks. It will give a subtle peachy glow to your face that will last.

IMG_20140302_110210

All of these are worth trying. I love them all and will try the other shades too.

I hope you enjoyed this post. Stay tuned for more cuteness.


Polka Dots Nail Art Tutorial

Polka dots Nail Art Tutorial

I love polka dots. Be it a dress, a handbag, a screensaver or a mouse pad. I just love them. They are so cute and classic. So I thought what could be better than Polka dots nail art. Being a mom of an active tot I don’t have any time to go to the nails salon so this is a very easy alternative to get your nails done salon style within minutes. You don’t have to be a skilled artist to do this. I do this while my son is bathing playing with bubbles.

You will need:

·         2 contrasting nail paints

·         Dotting tool/tools

·         Top coat nail paint

·         Base Coat (optional)

image

I used very basic nail paints I found at Target. My husband bought me the dotting tools from ebay. It took a month before they arrived from Hong Kong, but with free shipping and price under $4 I did not mind waiting. But if you can’t wait and want to do this right now, you can use things like toothpicks,  Bobby pins or anything with a round tip. The results would be the same.
I started by applying the yellow paint first.

image

Then I took a piece of paper and dabbed a bit of the purple nailpaint over it.

image

Then I selected the dotting tool I wanted to use. I chose one of the bigger ones to get bold polka dots. For beginners this is an easier one to use. You just need to make 4 or 5 dots per nail.

image

Don’t worry if the dots come out messy. Once you apply the top coat, things smoothen out. I did make a little mess too but if I have time I clean out the edges using a cotton ear bud dipped in the nail polish remover or acetone.

image

And… tada!!!!!! You now have your very own homemade polka dot nails!!

Tip: If you are right handed, try doing the art on your left hand first. Once you get a hang of it, you could do both hands equally good.

Have fun!

About

If you love little girl patterns on water bottles, Hello Kitty and her friends, polka-dot dresses, Teddy bear stickers, Owl jewelry and accessories, animal figurines, flower shaped silicon cupcake cases and all things cute and Kawaii, this is the place for you to be. I love exploring the cuteness that exists in this world and want to share it with you all lovelies. I will share with you all the adorable possessions I have and how you can have them too and others that I discover here and there. I travel a lot and find things from all over.

IMG_20131106_012147

I am a sucker for packaging. Anything that looks good from the outside, has to be good inside. Well, not always. But I still have to have it. Just so my eyes can feel happy looking at them (chuckles).

Today is my Nani’s (maternal grandma) birthday which I feel is propitious in starting my very first blog. I am from New Delhi- India but am settled in Southern California for the last 7 years. I have a full-time job in a software company and have a 3 year old son. Amidst all the craziness I find solace in finding myself surrounded by cute things, at home and at work. Keeps me sane.

Most of the stuff you will find here is very Kittyliscious. I just find them so cute. Anything with a cat face, those almond eyes and Yoda ears, is to die for. Team Fox can join in too I guess.